Mrs. Mauve Undergarments: A Review of Orchard Corset’s CS-411

“Scandaless” Undies!

101_7902

Yes, there is a dress attached to those SLEEVES.

Well, I did it! I have finished sewing the pink polyester-whatever dress– which I have named “Mrs. Mauve”– and all that is left to do is trim it, figure out how to trick my hair into assuming a vaguely 1890s syle, and find some time to take photos!

101_7653

Pragmatic anachronism at it’s finest!

I mentioned in my earlier posts that I was fitting this dress over improvised undergarments. I got a few questions about them, so I decided to use this as an opportunity to introduce one of my costuming staples. The corset I fitted my Mrs. Mauve dress over is my Orchard Corset CS-411. It’s a really comfortable, inexpensive underbust that, while not perfect for 1895 (underbusts came onto the scene around 1893, but weren’t common for daily wear until 1900), is a good option for Edwardian era costuming and an great companion for flouncy vintage dresses. For the Mrs. Mauve dress, I paired it with a underwire sports bra and a cotton tunic shirt for a chemise. Together, they helped hold the bust up to the proper place and prevented overtly modern jiggle.

CS-411 Corset Overview:
Price – averages $75 plus s&h
Fit – underbust to upper-hip, 10″ long
Shape – Hourglass curves

Pros:
Short length
Mobility
Doesn’t squish bust
Sturdy construction
Flattering shape
Comfortable
Fun fabric

Cons:
Laces too slick
Not enough curve
Bulky fabric

411_black_pinstripe_front__90579-1445017684-1280-12803fc3d2

Company photo of Orchard Corset’s CS-411 in Black Pinstripe

Price and Fit

My underbust-to-lap measurement is 9-9.5 inches (depending on how much I slouch). The CS-411 is 10 inches in front and 8.5 inches on the side, making it just short enough for my torso. I do get a little extra “uplift” in the bust, especially when I sit down. It is one of the shorter ready-to-wear corsets on the market at the moment and one of the cheapest– most Orchard Corset styles average about $75 but are often offered on sale (O.C. recently added an even shorter cincher, the CS-201). Besides my pinstripe version, the CS-411 comes in a variety of fabrics, including satin, cotton, and brocade. The brocade and pinstripe corsets are thicker than the satin corsets, so they are very sturdy, but your outside measurement will be larger because of the added bulk. For example, even cinched fully closed, my 24 inch corset has an outside measurement of 27 inches. If outside measurements concern you, the satin is your best option. They also offer this style in breathable cotton, but I have not tried it yet.

Shape

According to Orchard Corset, the CS-411 is a Level 3 silhouette. Level 3s are the curviest corsets the company currently offers. I definitely get eye-catching curves, but I wouldn’t classify them as extreme. There is a 9 inch difference between the hips and waist on my corset which remains fairly constant through all Orchard Corset Level 3s. It is perfect for tubular and round body shapes. Pear shapes might find the hips a bit tight. Ladies with natural hourglass curves might be underwhelmed by the CS-411’s shape since it may closely mimic your own body, fitting to it instead of shaping it.

Pros

I really like this corset. Though I bought it primarily for costuming, I wear it as a modern accessory, too. I have worn it to Thanksgiving (and eaten in it without trouble) and to the mall. It goes wonderfully under vintage pieces as well, which I love. Compared to an overbust corset or a longline corset, it is very easy to move around in. Since it is an underbust, it doesn’t squish my bust down or give me “quad-boob” as many off-the-rack overbusts do, nor does it rub my underarms– a big issue I’ve had with corsets in the past. I also love that I can sit normally in it without the bottom edge jamming into my thighs. It’s great for my posture, too!

101_6733

The pinstripe fabric I chose is a thicker poly fabric that has held up very well. When it is cold, the thick fabric gives me an excellent, warming hug! The construction of the corset is very nice quality; all Orchard Corsets are lined and have a waist tape, plus the CS-411 is double boned at each seam. The flexible spiral steels conform really well to my body and the cut of the corset gives a nice, swooping curve without rubbing my hips or ribs. It makes me feel very regal, but devious– always a good feeling to have in my book!

Cons

There are a few things about the CS-411 that bother me. The biggest gripe I have is that the laces the corset comes with are very stretchy and slick, so getting it to lace tightly is an exercise in futility unless you keep the tension very precise and constant when you are tying the laces. It also tends to loosen as you wear it, so even if I close it all the way and tie it tightly, half and hour later there will be a 1 inch gap in the back. Orchard corset does sell other laces, or you can re-lace it with something sturdier, but I wish they would just put good laces on the corset in the first place. The corsets are inexpensive enough that I would be able to afford, and would gladly pay, the extra $8 to have my corset come laced with good laces right out of the package.

101_7491
As I discussed earlier, the CS-411 has really nice hourglass curves, but if you are particularly curvy yourself, you might not be as impressed with your transformation. The fabric I chose is very thick, so while my waist inside the corset is ~24 inches, my outside measurement is ~27. Buying a corset to achieve a “proper size” isn’t how you should go about buying one, but if you are concerned about a smooth fit under clothes, the thinner (but still strong) satin is probably a better choice because it won’t have as much bulk as the poly-brocades do. The brocade also takes longer to break in and doesn’t mold as readily to your body. I would definitely buy a satin or cotton version next time. I am considering their shorter CS-301 for my vintage gowns since the CS-411 has a difinitive line around the hips that shows when I wear it under close-fitting gowns and in pants (the CS-411 does just fine with fluffy dresses, though).

All in all, the CS-411 is a good corset for the money. For historical costuming, it works well for 1890-1912 (or earlier with a firm bra and a cavalier attutude towards pure authenticity). The CS-411 does its job, and would be a good corset for a beginner, stage performer, or casual wearer. I’d rate it a 3.5 out of 5.

corsetrating

I am not paid by Orchard Corsets to give reviews. I simply wear their corsets and thought that others might appriciate a review about their use in historical costuming (there are plenty of waist training and general reviews of this corset online if you are looking to wear this corset with modern clothing).

For more information on corsets, please visit Lucy’s Corsetry. She is one of the best modern-corsetry experts on the web and covers everything from drafting your own corset to corsetting health concerns.

(The wild skirt is an Indian belly dancing skirt that someone was using for swing dance before I got ahold of it and decided to use it as a tawdry Edwardian petticoat!)

Other Corset Reviews:

IMG_0308

Corset Story’s Waist Taming Overbust with Hip Gores

The Ultimate One Pattern Piece Project: Elizabethan Coif

6 Steps to Fabulous!

Once again, I am breaking my vow to keep HSF posts off of my blog. However, this project has actually been on my plate for quite some time and by some miracle, it’s completion happened to coincide with HSF Challenge #11.

Since my costume fascination began, my favorite era has been the 17th Century. In particular, I fell in love with blackwork. However, I am incredibly inept at embroidery, almost to the point of being that cliché historical fiction character that scandalizes her family by acting like a impetuous tomboy…

Extras inside indeed: an extra dose of terrible embroidery skills and stubbornness, that is.

…okay, so that really would be me…

Though I have no embroidery skills, I do have enough hand-sewing skills to make me a decent small-scale seamstress. Combined with my love of the 17th Century, blackwork, hats and thrift, I have the perfect set of skills to be a decent coif maker, or at least an excellent blackwork coif faker.

Inspiration

I started this project without a pattern, just pictures and measurements from various online museums. I basically followed my wobbly seamstress instincts. The subsequent tutorial follows the method I developed to create my coif.

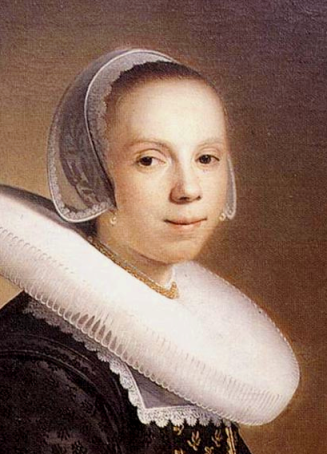
portrait

Detail of “Portrait of a Bride” by Johannes Cornelisz Verspronck
Besides her pretty coif, notice how tightly the wire of her headdress is pressing into her cheeks.

English Woman’s Blackwork Coif, circa 1600

Top Stitching and Gathering Detail on an English Woman’s Coif, circa 1590-1610
(see Step 5)

Women’s Coifs showing repetitive patterns and a variety of shapes, circa 1600
Another pair of similar coifs are also in the V&A, notable for one’s bottom edge: “Along the bottom edge, instead of a turned casing there are a series of loops braided in linen bread and stitched to the coif.” Another option for Step 4!

How to Make an Elizabethan/17th Century Coif

TITLE2

Illustrated in Microsoft Office Word  for your convenience and pleasure!

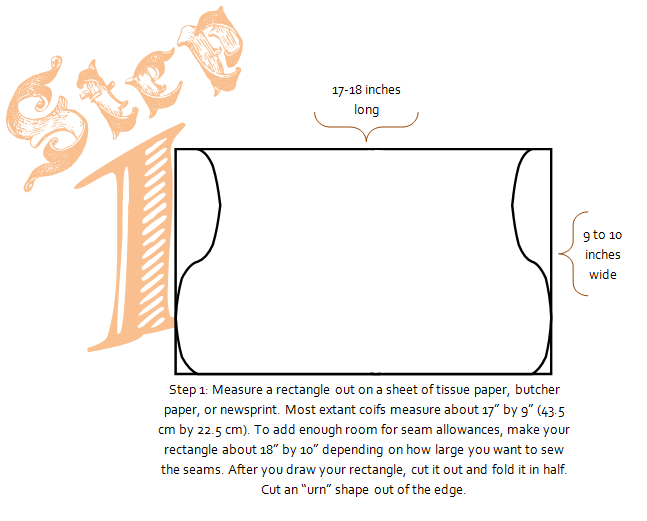
Large_Coif 1I used newsprint to create my pattern. Coifs from this period come in a variety of shapes, but most are based on a simple rectangle of fabric cut into a gentle urn shape. The top of the urn forms a widow’s peak at the top of the head and the curved bulge covers the ears. You can make your shape as simple or extreme as you like. Here’s my pattern:

Paper Pattern

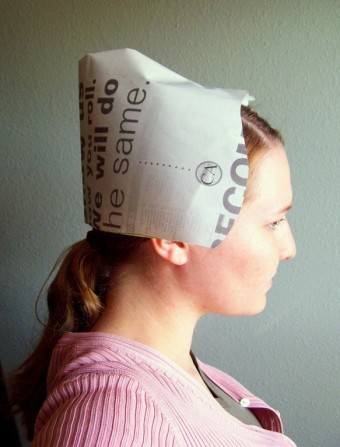
You can test the paper pattern by pinning the top edges together. Bear in mind that the fabric coif will be smaller because of your seams.

Paper Pattern Test

Opportunity for excellent party hats? I think so!

Large_Coif 2Since I cannot embroider well enough, I prefer to use pre-embroidered fabric. Finding a pre-embroidered fabric with a proper motif  and decent colors on a suitable fabric can be a real challenge, but I was lucky enough to find an embroidered cotton shirt for $3 at the local thrift shop. While it’s not perfect, it’s close enough!

Embroidered Shirt

After two weeks of searching for the perfect blackwork fabric, this is probably the most gorgeous thing I’d ever seen in my life. If finding an embroidered fabric is too difficult, you can use plain linen or silk.

I plucked the seams out, leaving me with enough fabric to make about 4 coifs.

Unpicking Stitches

Chinese machine embroidery is fairly easy to unpick, but it did leave prick marks down the edges and where there were darts. A little steam ironing helped make them less noticeable.

Capture

I can make two coifs from the back panel and one from each of the front panels.

For my lining, I used some cheap cotton sheeting from my stash. Elizabethan coifs could be lined or unlined. Many had removable linings so when the inside got dirty, the lining could be removed and washed, saving the delicately embroidered outside from wear and tear. Since my fashion fabric is completely washable, I sewed the lining into my coif as a permanent feature.

Large_Coif 3

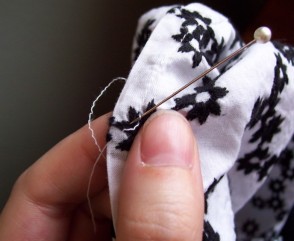
I really wish I’d taken more construction pictures, but I was too excited to pause for photos. I sewed my coif using backstitches set about 3/8 inch away from the fabric edge for clean seams. If your lining has a right side, make sure it faces teh right side of your fashion fabric so when you turn it inside out, it faces the proper way.

Large_Coif 4The drawstring casing can be done multiple ways, but just turning up the bottom edge worked best for my coif. I used backstitching again to close the casing because it’s strong and you can manipulate the stitches so that they hardly show up on the outside of the fabric. Since the seam can be seen from the outside of the coif, I made sure the outside stitches were as small as possible.

107_4253

This is the front edge of my coif, showing the smooth seam you get when you use the “pillow” sewing method to connect your lining. To make the front edges crisp, iron them from the lining side before and after sewing the drawstring casing. You can see the stitches on the inside of the drawstring casing on the right.

Large_Coif 5

This is the most complicated-looking step, but it’s actually rather simple. You’ve already finished 2/3 of the top edges by sewing them in step 3, so all you need to do is whipstitch the very top edge shut with small stitches. When you reach the end of you finished edge, sew around the unfinished edges. You can adjust how your coif fits by gathering more or less fabric. Gathering less fabric will make the coif pointy at the back while gathering more will give it a rounder look.

Coif Top Seam

Large_Coif 6

I used bias tape fror my drawstrings because it was what I had immediately on hand, but you can make ties out of yarn, linen tape, twill tape, shoelace, or braided cord. Threading your ties can be tricky. Some people like to use safety pins while others use wire to help guide it through the casing. I used a cheap, thin pair of tweezers to hold one end of my drawstring while I used the other end of the tweezers like a giant needle, pushing it through the casing.

Done!

107_4250

I would like to trim my next coif with a little bit of lace along the front by sewing it inside the seams in step 3. I would also like some twill tape for ties instead of my last-minute bias-tape drawstring, and to take pictures with the strings wrapped around the top like they are supposed to be worn. But for a blind first attempt, I’m rather proud of it!

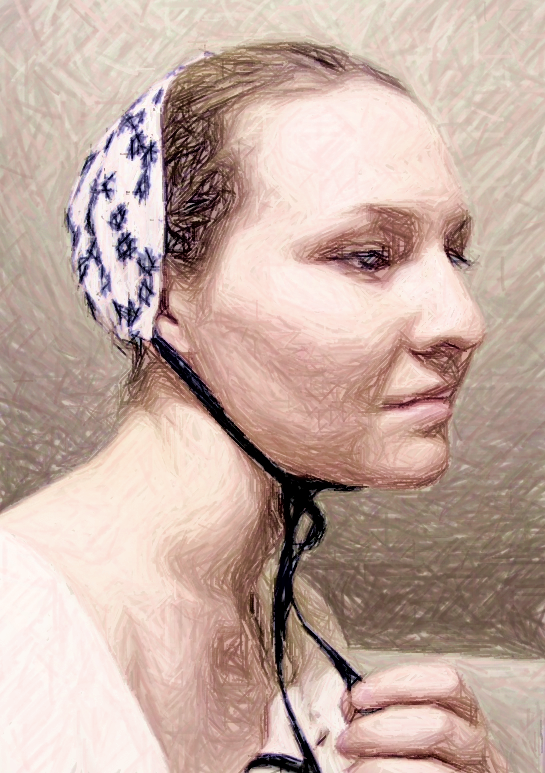
pencilportrait

paintingstyleresize

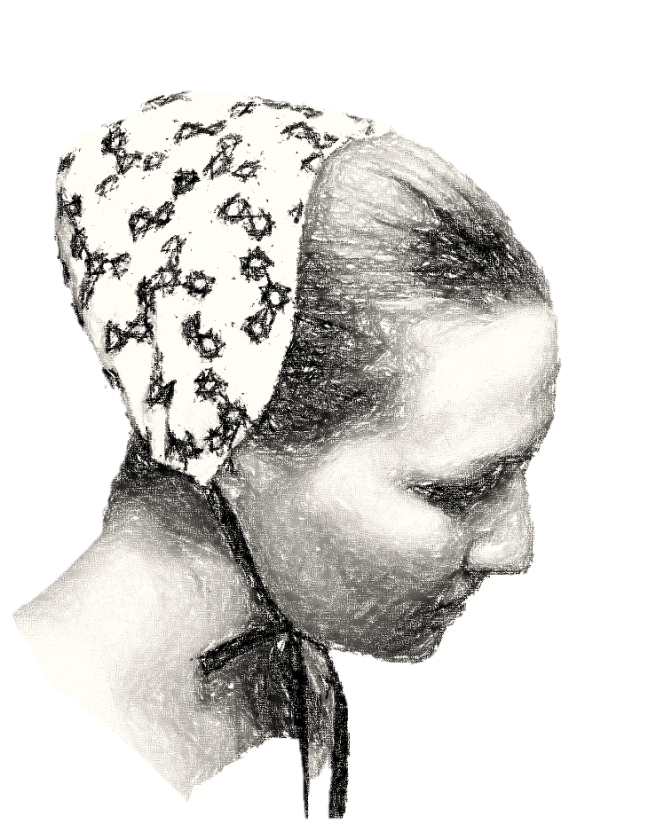
nobackground2resize

HSF Breakdown

17th Century “Blackwork” Coif

The Challenge: #11 Squares, Rectangles and Triangles
Fabric: A thrifted cotton shirt with cotton machine embroidery lined with even more cotton!
Pattern: I basically just measured a rectangle using coifs documented at the V&A and cut a light “urn” curve into the sides
Year: 1600-1630
Notions: Cotton thread and bias tape
How historically accurate is it? 50% It’s not linen or silk, but it is all natural fibers. The embroidery pattern is entirely modern, but from a distance, if you squint, it looks fairly legitimate. The construction method is pretty accurate as is the size and how it sits; however, I have much more hair than this coif can contain. It will sit on my head by itself, but I feel more comfortable tying it on so I don’t feel like it’s constantly going to fall off. Next time I will make the coif a bit deeper or try using hair pins to hold it on.
Hours to complete: 3 hours
First worn: By me…at 3am…in my apartment
Total cost: $3 for the embroidered shirt, stash sheeting, and stash thread

A matching forehead cloth would also be nice, and I have plenty of fabric left over for at least one!

Coif and Forehead Cloth, circa 1610

More Coif Tutorials and Information

Full-length Coif Tutorial” – All of the steps from this page in one looooong image

The Coif Question” by Kate at Dressing Terpsichore – Explains why most extant coifs are one-piece, but most paintings appear to have two-piece coifs

Elizabethan Coifs!” by Morgan Donner – Examples of how a coif should be worn with  a forehead cloth to get the proper look

Coif Patterns” at No Strings Attached – Multiple patterns for different styles of coifs

UPDATE!

1-coif-piece-600x600

Truly Hats now offers coif-sized blackworked (by machine) fabric for only $10! The pattern is a replica of an extant 16th century piece.