
One Pattern to rule them all; One Pattern to make them; One Girl to sew them, and with some changes, fake them!
Autumn Day Dress, circa 1855-60
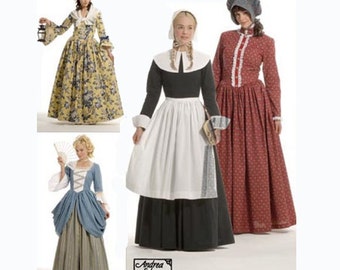
I am not afraid to admit it: I have a not-so-secret love affair with 3723. Buying patterns for each and every specific era can be really expensive considering that patterns run about $15-$25 each. Simplicity patterns are no exception, but stores often run pattern sales for the Big 3 pattern makers. I got my copy of Simplicity 3723 for 99¢ during the Lobby of Hobby’s pattern sale. It’s the catch-all pattern designed to make basic “Pilgrim, “Colonial,” and “Prairie” style dresses using as few pattern pieces as possible, so instead of having to buy a different pattern for each era, you get a whole bunch of options in one. None of them are meticulously historically accurate by any means, but the shapes and styles are very easy to manipulate even for someone as ham-handed as myself.

Simplicity patterns get very little love in the historical costuming community, which is a shame. They may not be historically accurate, but they are readily available and in the case of Simplicity 3723, supremely modifiable– great for fitting practice and flexing your creative muscles! You can literally make a dress from almost any era with just this one pattern and plenty of chutzpah. One of my previous costuming projects involved transforming Simplicity 3723 into something a little more historically accurate for the 18th century:

My 18th century Lady’s Maid Dress from 2013
And more recently, an 1880s Bustle Dress:

My 1886 Day Dress from June 2014
Fit First!
After making the 1886 day dress, I have pretty much refined the pattern to fit my torso properly. Most patterns are drafted for someone between 5′ 4″ and 5′ 8″ with an “average-length” torso and a B-cup bust. Some people are lucky enough to match standard patterns pretty well, but I’m broad shouldered, large-busted, and short-waisted, so no matter what, I always end up altering patterns to fit.
If you’ve ever been disappointed by how your costume looks after you’ve sewn it up exactly like the pattern said to do, it might be because the pattern doesn’t fit you quite like it should. The pattern shapes that come fresh out of the envelope are not absolutes! They are printed on paper not just for economy, but because they are designed to be cut, folded, and reshaped to fit you best. If you’re worried about ruining the original, trace the pattern pieces onto some cheap gift tissue or butcher paper so you can slice, dice, fold, and fiddle without fear. I encourage you to check out the many fitting guides you can find in books and online. For example, I have a simple pattern alteration guide from New Mexico State University saved on my desktop for quick access.

Hint: Pattern guides often leave this little tip out, but most modern patterns have armholes (armscyes) that are too low. Simplicity 3723’s are especially deep. If the armscye is too deep, it will make raising your arms difficult, creating a “bat wing” effect. Instead, the armscye should fit fairly close to your armpit. THIS SIMPLE PATTERN ALTERATION IS LIFE CHANGING! I will admit that I didn’t raise the armscye quite enough on my pattern. I only raised it one inch. On my body, Simplicity’s armscyes needed to be raised at least 2 inches. This handy guide explains how to get the right fit around your arm for an amazing fit every time. If you can get the armscye to fit right, you’ll be surprised how much better the entire bodice will look.
Since I plan to make many dresses out of Simplicity 3723 in the future, once I got the bodice portion to fit me correctly, I transferred the pattern onto some sturdy interfacing so I could use it over and over again without having to worry about ripping/overpinning/finding the cat chewing on the original tissue pattern. Now I have the basic building blocks for a whole wardrobe of fairly easy to make historical outfits!

Label the new pattern with the original pattern and piece number, any sewing marks, and what alterations you made. Adding a date created and/or the measurements is also helpful. Bodies tend to change over time!
One Pattern to Rule Them All Challenge
The glory of Simplicity 3723 is once you’ve got the bodice to fit, you can make tons of dresses from different eras by just manipulating a few key bits! So, I decided to challenge myself by making a dress for every major costuming era as a way to stretch my costume budget, encourage more focused research, practice fundamental sewing/patterning skills, and encourage creative thinking (something that can be surprisingly hard in the midst of the unemployment doldrums). I’ve decide to limit myself to no more than 5 pattern alterations for every project (aside from the ones for basic fit), so if anyone wants to fiddle around with the pattern, they can get similar results.
(These tweaks should also work for Simplicty 3725, which is the children’s version of Simplicity 3723)
The Inspiration
Simplicity 3723 includes a “prairie dress” pattern, View A. It’s based off of American pioneer garb from the mid-19th century mixed with 20th century fitting techniques, producing costumes very similar to those used in the beloved Little House on the Prairie TV series, hence the term “prairie dress.”
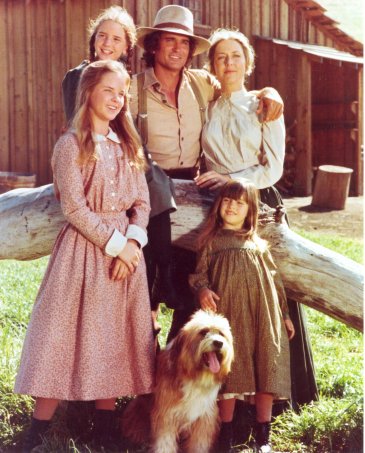
“A Christmas They Never Forgot” always made me cry when I was little. Still my favorite!
I’ve steered clear of “Civil War” and other mid-19th century costuming for a long time because, sadly, as one of the most popular reenacting periods, it can get pretty catty and cut-throat when it comes to historical accuracy. There are entire webpages and Facebook groups dedicated to “farb” shaming. In fact, the pejorative term “farb” originated in this particular era of historical reenacting.

Hoops showing? What a Farb!
This particularly strict and sometimes vicious attitude is one of the many ill experiences that caused my teenage self to abandon historical costuming for years. However, that experience (among others) led me to create this blog. Thanks to time, practice, and lots of new, more supportive costuming friends, I decided to give the 1850s a try; after all, my figure is pretty well suited for it! There are plenty of historically accurate patterns for this era out there, but when I confront a challenge, I like to challenge it back.
Simplicity 3723 is most definitely a “farb” dress by reenactor standards, but it was never designed to be perfectly accurate anyway. The pattern designer, Andrea Schewe, created this pattern specifically with small-scale theater productions in mind that need to clothe lots of actors with few resources. View A is actually pretty good straight out of the envelope (personal fit issues aside). If you need a mid-19th century dress for a school play, just make it up as directed and add fluffy petticoats for a convincing 1840s-60s character. The one-piece construction is historically appropriate as well as convenient, plus there’s enough fabric in the skirt to cover a 90-110″ hoop skirt. However, I wanted something a little more distinctive. The 1850s and early 1860s are famous for wide skirts and equally wide sleeves. And, as you probably know by now, I love big sleeves!
There are tons of inspirational photographs and extant garments to choose from, but in my case, the fabric actually came before the dress was even an idea. I found this wild, but utterly perfect quilting cotton at Walmart for just under $3 a yard. It’s part of 2014’s “Circles on Stripes” pattern, which came in blue, green, and brown backgrounds. All the ladies at the fabric counter thought it was pretty ugly, but I chose the brown. At the time, I had no intention of making a Victorian dress, but it gave me the fabric fuzzies inside, so I knew I had to have it! I bought 6 yards.

I discovered a really nifty thing! If you go onto Walmart’s website, it’s horribly hard to look through their fabric listing, but if you really need extra yardage (as I did), but you’ve exhausted the supply at your local store, the website will actually tell you which stores still have your desired fabric in stock! That way, you don’t have to waste as much time driving store to store looking the hard way.
My particular pattern looks very similar to the ones found in this book of 1860s cotton swatches:

It’s thick, as most quilting cottons are, much thicker than much of the cotton fabric available in the 1850s. In fact, the texture of my cotton fabric is quite close to Victorian dress-weight wool, which, as it turns out, was often printed with wild, bright patterns very similar to Walmart’s quilting fabrics! You can find quite a few photographs of ladies wearing eclectic prints:


Women in Print Dresses, circa 1855-65
This set of photographs is from an eBay auction.
Another must for the 1850s besides big bell sleeves is fringe and tassels!
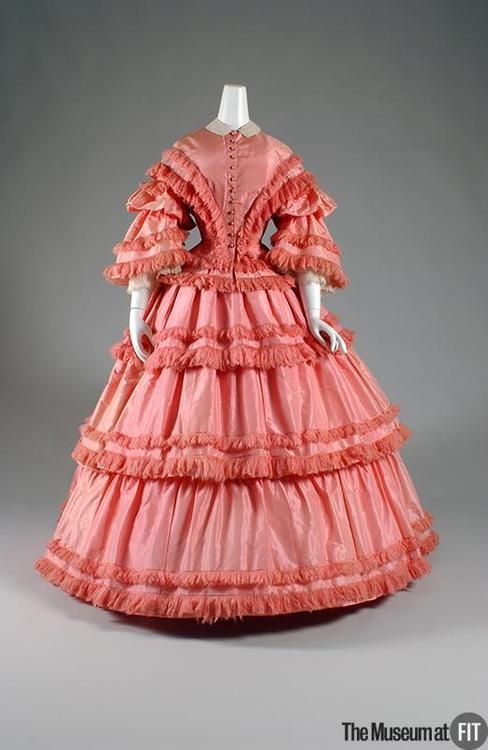
Afternoon Dress, circa 1857
Okay, perhaps not quite so much fringe…
After looking at lots of designs and photos, this was the design I came up with:

One of the most important aspects of historical costuming is the shape of the waistline. The 1850s was transitional when it came to waistlines. The 1840s had really long, pointed waists and the 1860s were short waisted and rounded. Simplicity 3723 is long waisted with a slight point at the front, making it perfect for late 1840s and early 1850s. I’m naturally short waisted, so when I altered the pattern to fit my body, the waistline became more rounded with a slight dip in the front, pushing it closer to the late 1850s to early 60s.
To get the look I desired, I had to make the following alterations to Simplicity 3723:
(+1 skill point indicates something I’d never done before!)
1. Front Opening – The original dress pattern is made to zip up the back. To make the dress more historically accurate (and so I wouldn’t have mess with sewing in a zipper), I opted to make the bodice close in front with hooks and eyes. To be able to get the dress on, I added an 8″ deep lapped placket to the front of the skirt (+1 skill point!).
2. Dropped Shoulders – 1850s dresses had dropped shoulders, meaning the armscye didn’t sit at the top of the shoulder joint, but further down the arm (+1 skill point!).
3. Period Skirt Finishes – To get the most out of the fullness, I cut the skirt panels out of the full width of the fabric (in my case, 45″). Instead of gathering the waistband of the skirt, I used overlapping knife pleats. Originally, I was going to cartridge pleat it (another period method of fabric control), but after fiddling with it a few days (and ripping out yards of stitching), I decided knife pleating suited my tastes more. If you use 60″ fabric, your skirt can be made even fuller and you’ll probably want to use cartridge pleats to draw in the waistline. To help support the hemline, many Victorian dresses had hem facings between 4-10 inches wide (some even wider). I decided to go with a 5-6 inch wide facing.
4. No Collar – This is a small change. Instead of completing View A with a collar, I just left it off.
5. Pagoda/Bell Sleeves – I redrafted the sleeve pattern because nothing screams 1850s like sleeve swag! (+1 skill point!)
The Pattern

You only need 5 pattern pieces to make an 1850s dress!
If you haven’t worked with this pattern before, measure yourself wearing your undergarments of choice (especially if you plan to wear a corset) and choose the closest pattern size to your measurements. I recommend choosing a pattern size according to your bust measure, but generally speaking, this pattern is pretty true to size with a good amount of ease (2.5 inches in the bust) built in for the average, active wearer. As I mentioned previously, I performed basic pattern alterations to make sure the bodice pieces, mainly bodices pieces 1 and 2, fit my body. Buy some cheap fabric, second hand sheets work perfectly, and make a mock-up of the pattern to gauge where you’ll need to make changes to the pattern, if any.
Many 1850s dress have very low dropped shoulders. I have wide enough shoulders as it is, so I find dropping the sleeves to be a bit unflattering. I decided to drop the sleeve only two inches, which I achieved by adding to the shoulder of my pattern:

This is only an inches worth of drop which I tried for my first mock-up. I later extended it to two inches. Sadly, I didn’t get many action shots of this dress’s progress, for which I apologize!
The only other major change to the pattern pieces was turning the straight sleeve into a pagoda sleeve. I wanted a nice, fairly fitted upper with a generous lower bell that ended above my wrist, so I took the long sleeve pattern from View A and marked where the elbow was (this is where the flare would begin) and where I wanted the sleeve to end. Then I drew a gentle curve out about 3 inches between the two points. This hastily-drawn image explains it much better than I can:

It doesn’t take very much extra flare to make a really full sleeve. For extremely wide sleeves, you can begin the curve above the elbow almost at the shoulder line. I had to make a few mockups before I got a curve I liked.

Too much curve! This is what happens when the angle of your curve is too sharp and too wide.
Cutting
For a front closure, I needed two separate halves instead of a single piece. So instead of placing the bodice front piece on the fold, I placed it on the selvedge. Make sure your skirt panels are the right length (remember that you may need to add some extra length if you are using hoops larger than about 100 inches) and to cut them the full width of the fabric if you are using 45″ fabric to get maximum volume. Otherwise, follow the cutting directions provided by the pattern. I also had to account for extra yardage for my sexy new, voluminous sleeves (about 2/3 yard extra). I flat lined my bodice using a thrifted cotton sheet. Sage advice: Flat line all your Victorian bodices. It’s not only period correct, it also makes taking things in and letting them out so much easier!
 I cut 6 inch wide strips of fabric across the width (45 inches) of my fabric and sewed them together to create the hem facing. For the front placket, I cut a bias-cut rectangle twice as long as the opening and about 2 inches wide.
Assembly
Assemble according to envelope, but instead of inserting a zipper in the back, sew the two back pieces together and leave the bodice front open for hooks and eyes. I added a modesty placket so if there is any gapping, it will be much less noticeable. Since that created an overlapping closure, I used bars instead of eyes:

Modesty placket

Front opening
To make the placket for the front opening, I followed this surprisingly simple tutorial from Sense and Sensibility patterns for a slash/lapped placket:
I bag-lined the sleeves with some cranberry cotton, using the scraps to make some pinked-edged ruffle trim for the sleeves. After everything was assembled, I sewed on some showgirl-worthy tassels. You’ll notice that my original drawing had a square design on the bodice. On paper and my dress form, a square looks great! On me….not so much. So I took inspiration from this dress (really, its the pelerine, but it counts!) and went for a much more flattering sweetheart design.

Obligatory “Kitty Helper” picture!
So after, two months and three sewing machine needles later (don’t ask), was my 1850s dress successful?

Your comments about Walmart’s fabrics are interesting. I really didn’t like the fabric choice, but it does look more authentic in your finished dress when looking at the old photos.
Authentic doesn’t mean ugly, but ugly sometimes means authentic! :P
You know me, I like turning ugly duckings into swans. I actually like this fabric though, odd as it is.
I love, love, love what you have done with this pattern. It is what I HOPE people do with this pattern, although I like the fact that it is super easy so very accessible.
Would love to meet you someday and/or do a blog exchange, perhaps. I love some of your other posts as well. I, too, am a pragmatist.
Write me a message on the contact page at my website and I will give you my email. Oh, wait, I think you will have my email when I send this message.
Andrea Schewe
I love it. I always want to make a fancy historical-ish dress to wear with my daughter trick-or-treating. Last year I made a lovely bonnet. I might just make a dress like this. THANK YOU FOR THE TUTORIAL! I think your dress is lovely
Thank you! And if you do make one, can you send me a picture through Facebook? I love seeing what others have made!
I am so thankful to find this. I purchased this pattern as well as #1818 at the same store at the same price. only to be shamed by veteran reenactors who have more experience, more shopping options and more $$$ now I know I CAN make a 1860s dress with my cheap patterns. I wish there were more people sharing their pictures of andrea schewe patterns 1818 and 3723 thank you ever so much :)
Check out the website Sewing Pattern Reviews if you haven’t already! It has almost every pattern you can think of and many people have pictures accompanying their reviews! Here’s the Simplicity 1818 page, for example: http://sewing.patternreview.com/Patterns/53503
I am sorry you felt shamed by vet hobbyists. Sometimes in the pursuit of HA we come across as know-it-alls. Have found after 30 yrs in the hobby nothing is written in stone. I found Past Paterns about the same time I started re enacting and since they were taken from originals I chose a basic bodice pattern. Still use it for all my start pattern since this differences in dresses fall back to the sleeve, fabric choice and trim, usually. But I have noticed you seem to have a better handle on sewing techniques historical and modern than some. Simply having a hoop under a long skirt does not a Civil War dress make. Keep plugging away and helping others in the pursuit of historical fashion. Your obedient servant, Mrs. Lawson’s Mercantile
As vindictive as it may sound, spite is often the best motivation. Nothing gets my creative engines roaring like blazing my own trail after someone decrees “my way or the highway!”
I saw your finished dress in part II and I do think it is the loveliest of all the dresses you have made from that pattern. I just think it suits you well and is very attractive – particularly the splendid job you did with the hat and your hair. You make a great 1850’s lady! I came across your site as I was searching for patterns and tutorials from about 1800 to 1920 that I am hoping to make with ladies from my church on church history. Your dress and sharing the process are very helpful and inspiring to the budding sewing enthusiast like myself! Thank you so much for sharing the process. I am hoping our finished products will go well with 100 y.o. log cabin we are restoring to help share the history of or church and country! Many thanks! ~ Jennifer
This was as entertaining to read as it was educational and inspirational.
Your kind words brought a smile to my face. Thank you!
I always thought that not all pioneer women could afford hoops to go under their dress and therefore had cotton slips with a lot of ruffles and maybe as many as four or five slips to get this effect to stand out. Just saying.
Wow! This is really impressive! My daughter and I loved looking at the pictures of how you put this together. We just happened upon your site when we googled ‘civil war era dresses.’ You are so talented!
Thank you! I am so happy my blog was useful to you. Happy costuming!