A Valentine’s Chocolate Box Juliet Cap: Margo Anderson’s Cuffietta Pattern

“You are a seamstress. Borrow Cupid’s needle, and sew with them fine edges bound” –Not Mercutio

Exactly two years ago in 2021, Margo’s Patterns, which specializes in Renaissance era patterns for men and women, offered to let me help pattern test some of her newer patterns.

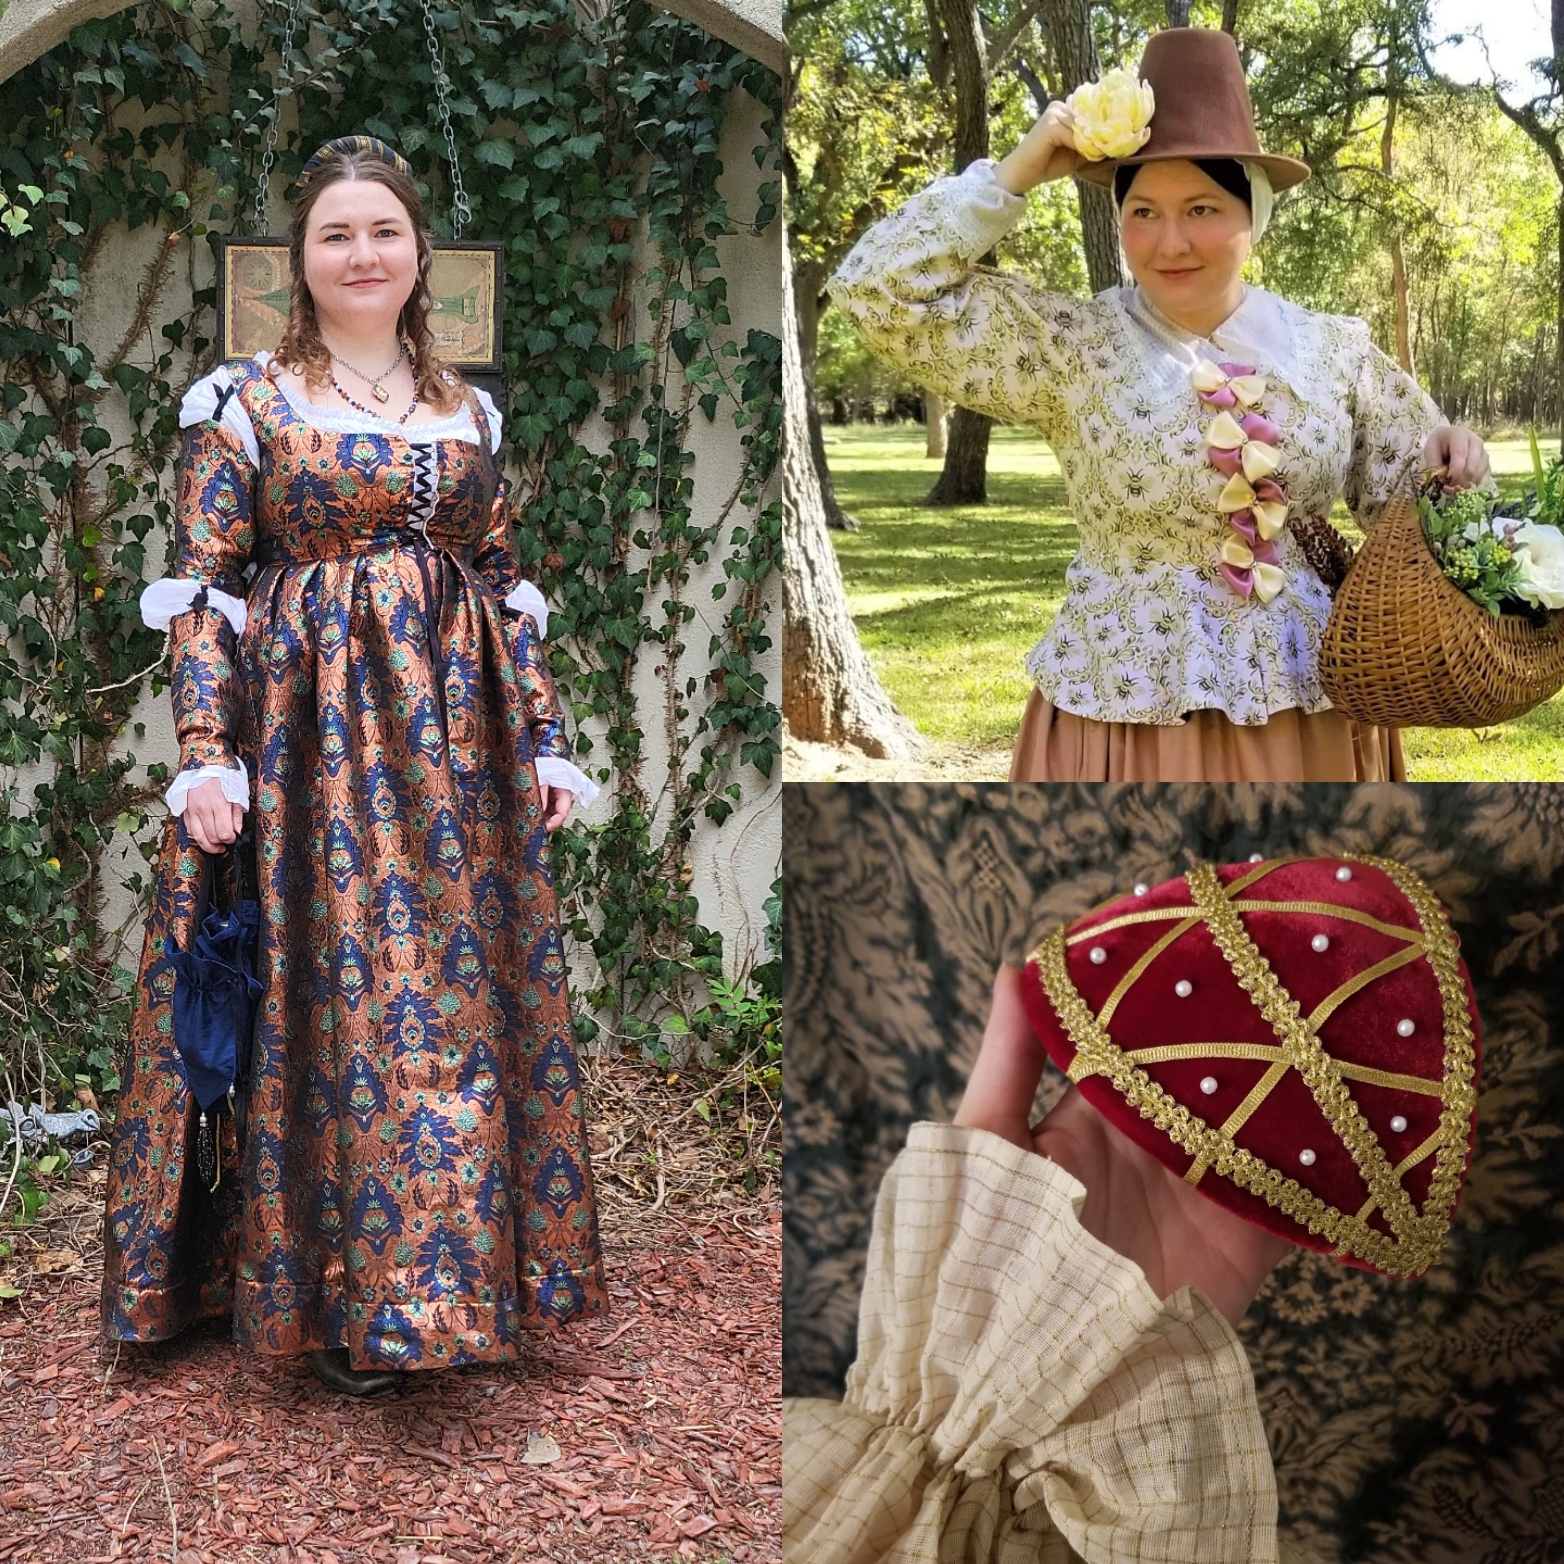
The first pattern up for testing was an Italian Cuffietta, a Patreon-exclusive at the time, now part of Pattern 029. This pretty design is based on the little football-shaped caps worn in a few late 15th century Italian portraits (most famously Ludovica Tornabuoni) and made famous by productions of Romeo and Juliet, which have dressed Juliet’s actress in such caps for centuries. Thanks to its iconic association with the Shakespearean play, the style is are commonly known as a “Juliet cap” in both fashion history and modern bridal wear.

I was excited to try out this pattern because it was a small project, perfect for breaking a sewing drought, and because it gave me an opportunity to use a pearl necklace I accidentally destroyed a few weeks earlier!

So that’s why my brain’s been all fuzzy! All my pearls of wisdom rolled away.

It was also nearing Valentine’s Day and it seemed fitting to make a red velvet “chocolate box” style cap for English Lit’s most popular tragic lover.

The pattern recommended buckram, but I used some bee-printed cotton duck soaked in a 50/50-ish mix of Aleene’s Tacky Glue and water. It worked like a charm! I applied the mixture with a paint brush, making sure the cloth was soaked enough to be wet through, but not so much that pools of glue would leave plastic-y spots on the surface. I did it on a piece of aluminum foil so I could easily peel it off when it dried. Don’t use wax paper or plastic wrap. The wax paper disintegrates with the moisture and tears. The plastic wrap too easily wrinkles, causing your homemade buckram to wrinkle as well. Foil is much easier to keep smooth and remove later.

I used this fabric for my Jaco”bee”an Jacket, too. I’ll get a post for that project written soon!

The directions were very easy to follow, even the part where you have to zig-zag the butted center seam together, something I’d never done before. I sewed floral wire from Dollar Tree around the edge by hand rather than by machine. Same for the binding made from a scrap of bias tape. At this stage, Chris walked in and asked if I was finally giving up and sewing my own bras after whining for years about the terrible state of the American underwear market. And that’s when I realized my boobs were the same size as my head!

34 J US for reference, LOL!

To hide the seam, I used some double-layer gauze I got from Walmart and then covered the whole thing in some rayon velvet cut from a shirt I’d been hoarding from Goodwill since 2014.

If you are making a solid cap instead of a net one, velvet is the perfect fabric because it hides stitches, it grips the hair to hold the cap in place, and it is bougie as heck!

The decoration portion is entirely up to personal preference. I decided to combine the chocolate box and historical netting looks together, stash-busting some thin metallic gold ribbon applied in a criss-cross pattern which I then decorated with the pearls from the broken necklace.

I opted to sew everything on by hand rather than hot glue for once. It took twice as long to decorate as it did to assemble the base, but it was worth it.

The cap was complete! But to properly show it off, you also need the period-appropriate hairstyle. My natural hair is very tent-shaped, randomly wavy, and unruly–like spaniel ears.

CursedImage.jpg
But seriously, it’s uncanny!

And, it seems, that works out in my favor because my favorite wild-hair eras are full of dog-ear hairstyles!

Woof! 1450-1500 (Allegorical Portrait of a Lady), 1660-1680 (Portrait of a Woman), 1820-1850 (Anonymous Portrait of a Woman)

To achieve a properly puppy-eared late 15th century hairstyle, I center parted my hair. Then I parted out my bottom layer of hair by running my thumbs along the sides of my head diagonally from my temples, leaving a curtain of hair hanging around the bottom half of my head. The top I gathered into a tight bun. I used the same clip-on ponytail hairpiece that I used for my Game of Thrones hairstyle, turning it into one thick braid and wrapping some of the gold ribbon around it. Attach it to the bun and wrap the braid into a thick coil at the back of the head. The bottom curtain of hair I curled with my thinnest curling iron. Gently separate the curls with your fingers.

You will look goofy until the last moment. That’s how you know you’re doing it right!

When you’re done, you’ll realize how nicely the Cuffietta/Juliet Cap finishes off the look!

You may also discover that in addition to looking smashing as a cap, a cuffietta makes an excellent multi-purpose accessory!

Interested in more Italian Renaissance costuming? I’m working on a short write-up about my pattern test for Margo’s Italian Renaissance Gamurra pattern! It will be posted soon.

In the meantime, you can check out my adventure making the Simplicity “Ever After” dress pattern (the one you see in the pics of my cuffietta) or visit one of my favorite Italian Renaissance costume blogs: “Diary of a 1480s Florentine Gown” by Jen of Festive Attyre! She has her own version of Ludovica’s cap on there, too, if you’re interested in seeing what a net cuffietta looks like.

One Pattern, 120 Years: Adapting Butterick 6093 for Regency, Teens, and 1930s

Butterick Patterns has a set of patterns called the Retro line. The Retro patterns skirt (ha ha!) the line between costume and everyday wear: it caters to those looking to revive vintage styles in their daily wardrobe, also known as “historybounding.” Most are 1950s patterns, but they did shock and confuse the non-costuming crowd a few years ago by sliding a few 1910s patterns into the mix, including Butterick 6093, a pattern based on day fashions from 1912.

Now, folks had strong reactions to this pattern when it came out, mostly because the styling of the model was neither modern nor historical, but an odd mishmash. However, it quickly won folks over. I love Butterick 6093! It is a great simple pattern. I’ve already wrote a ton about it, so I’ll spare repeating myself again here, but if you want to read more about the pattern, you can check out my numerous blog posts about it.

I am all about versitility…and sloth. Once I have a pattern down pat, I want to use it over and over instead of having to start over again with another pattern. I made several 1910s versions of Butterick 6093, why not see where else I could take it?

So I rolled the calendar back 100 years from 1910 to 1810(ish) and made a Regency dress!

1910s and Regency fashion have a lot in common on the most basic level: high waistlines and columnar skirts. They have vastly different construction methods, though! Butterick 6093 isn’t historically accurate to Regency or 1910s construction (uh, invisible zipper, anyone?), but when I was invited to a luxurious Regency Valentine’s tea by Laura of Decor to Adore, I decided to see if I could make a Regency dress out of this pattern.

To turn Butterick 6093 into a more Regency-esque shape, I had to alter a few things, mainly the skirt.
1. I used the under-skirt panel from Butterick 6093 for the front, adding length so that it reached the floor instead of my ankles.
2. I left off the overskirt and wrap front pieces.
3. Then, for the back, instead of cutting the fitted skirt back, I added ~24 inches of width and pleated it to the back.
4. I cut a wedge shape out of the back bodice waistline to mimic the high Regency bodice backs popular at the time (plus I’m short-waisted anyway, so it fit much better)
5. Then I trimmed the sleeves with pinked self-fabric trim.

Otherwise, I followed the normal pattern instructions, including the invisible side zipper!

Is it Historically Accurate™? Not in the least! But does it make a flattering, passable dress for a fun day out with friends? Yes!

Becky is wearing a similarly styled dress, but from a more accurate pattern: the cross-bodice dress from the Sense and Sensibility Elegant Lady’s Closet pattern set.

Ah, the winsome pre-Covid days when we all gathered in other folks’ houses for dinner parties!

Just a month later, Lockdown began.

Stuck at home, I should have been in the midst of a creative bonanza! Here I had all the free time in the world– but I had no energy. It was too stressful, watching from windows and wondering what was going to happen. The depression was real. I slugged away in bed most days. But I did have one more idea for Butterick 6093…

I was going to be stuck at home, why not make a house dress? Browsing Pinterest, I stumbled upon some 1930s catalogues and old Lane Bryant ads for house dresses in cute cotton and rayon prints. I had some daisy print cotton I’d bought at Walmart ages ago because it screamed 1930s at me. Now, locked in the house and needing a project, it seemed like the perfect solution to the creative slump.

As you can see, there were plenty of wrap and faux-wrap style house dresses with wide collars to choose from! They looked so much like Butterick 6093, I knew I had to make one last transformation out of it.

To make Butterick 6093 more 1930s-esque:
1. I shortened the skirt and added a kickpleat at the bottom for ease of movement.
2. I lengthened the waist a few inches to put it more at the natural level.

I opted to leave off the faux-wrap skirt pieces, but as you can see in the original ads, you could add one or both and still maintain a 1930s look.

That’s pretty much it!

Sounds simple, right? Well, it is, but in reality, I started this project in Spring of 2020 and I only finished it last week…NEARLY A WHOLE YEAR LATER. I jokingly started calling it my “Depression Dress” because it was from the Depression Era and I was depressed so…ha ha! Dark humor.

I just wasn’t feeling it. I struggled with picking trim for the dress– overwhelmed by possibilities– then stalled out at the hem and zipper completely.

I hung it on my door a while, waiting in its half-finished state.

Then, last week I finally decided to just finish the dang thing! When I grabbed it off its lonesome hook, I discovered it was even more complete than I remembered: really, all it needed was the zipper and the pocket! I waffled a bit on the pocket: without it, the dress was much more flattering, but the crochet pocket is an antique from my grandma, and what more perfect place to use it than on the exact type of dress it was originally made for? (You can see a similar little crochet pocket in one of the ads above)

And thus, nearly a year later, I finally completed my Butterick 6093 1930s house dress!

The yellow glass buttons were a last-minute addition. I found them in the bargain bead bin at Walmart, of all places! They came in a $1 pack mixed in with other random pressed-glass buttons, clearly all made from antique molds.

Butterick 6093 is now, tragically, out of print, so it can only be purchased second hand. If you don’t already own a copy, it is worth investing in! As you can see, it is quite versatile!

This pattern experiment was also a great example of how fabric choice and accessories really affect the final outcome of a pattern. My philosophy is that if you don’t have a perfectly accurate pattern, having an period-plausable fabric and accessories can help make up for it. It also works vice versa: an accurate pattern and fit can transform a less-than-ideal fabric into something more historical looking. Each of these three Butterick 6093 dresses are almost identical in style and are all made of cotton with a side zip (ahistorical for every era but the 1930s dress version, of course!), but the different fabrics enhance the illusion of their representative eras.