Nitty-Gritty Gibson Girl: Fluffing Flat Hair without Rats or Hairspray

From Capellini to Fusilli!

Hair is the hardest part of costuming for me. It’s an essential component for any full look, yet it escapes me. My family is low-maintenance, so we never bothered with fancy hairdos. My father has naturally wavy hair, but my sister and I both inherited our mother’s soft, but decidedly fine and straight hair. Truthfully (as my long-suffering mother can attest), I didn’t even let anyone put my hair up in so much as a ponytail until I was in third grade and then it never came down again. Down and wild or ponytailed and smooth has always been my modus operandi. Doing anything else with it is a lot of hassle for a hairdo that will go limp in a few minutes even with half a can of hairspray flooding it from root to tip.

The Dream

101_6686

The Reality

I have practiced more over the years, but curls, puffs, rats, and hair products remain firmly out of my realm of expertise. The curling iron laughs at me. Pincurls don’t stay curled. A perm is a distant dream.  So what can a stright-fine-greasy-yet-dry hair girl like me do to create all the fluff a stylish historical vixen needs? Braids, baby! Braiding your hair to get the needed volume is an old trick from the days before mousse and hairdryers.

Enid Bennet, circa 1920
Frizz is your friend!

I like having my hair braided. However, I can’t wait to undo them because when I take braids out, I get full-on poodle fluff! They give you that frizzy, fly-away volume that works perfectly for 18th century and Edwardian hairstyles!

103_4197

BAM!
I took this picture after wearing two braided pigtails all day.

What follows is my slap-dash Gibson Girl Pouf experiment.
This method works best for hair that is shoulder-length or longer. It’s by no means a perfect system since it started as an experiment, so keep that in mind. What works for me may not work for your hair, but it’s worth a try if you’ve also struggled with the puff!

 I have a very firm center part (naturally) and years of wearing a ponytail has trained my hair to fall back and flat. This causes my hair to gap around rats and flop around my ears. It’s also oily– yes, I have tried all the treatments; I’m just naturally that way– and smooth, so pins don’t stay in for long. Recalling the miraculous fluff of my post-braided hair, I decided to perform an experiment. To retrain my hair, I braided it upwards, towards my face. That’s key to getting volume into the roots. I did that to my whole head, braiding up and forward.

101_8162YAY! I did illustrations!
(because I honestly and for true didn’t expect this to work, so I didn’t take many pictures)

The point of these braids isn’t to create neat little plaits for day wear, so looks don’t matter.

Photo-0284

Thank heavens!

I did the front half of my head in four sections: front (bangs), sides, and crown. The back I braided and smooshed into a vaguely bun-like shape. To keep my sexy braids in check, I coiled them into mini buns.

101_8163

hairknots

Thus making them even sexier.

If you can braid your hair wet, then do it that way. I don’t like messing with wet hair. Wet just makes it more tangly. Instead, I braided my hair then took a hot shower to soak it. After that, I tackled some projects for a few hours until my hair was dry enough that it wouldn’t sop the pillow. Then I went to bed.

I have (tried) sleeping in curlers and pin curls before and found it impossible. I thought that the giant bulky braidy-buns would be bothersome, but aside from the neighbor’s decision to practice drums at 2 am, I slept well.

My hair was still damp in the morning. If you have a blowdryer, you can dry your hair that way, but I don’t have one at the moment. Instead, I entertained the neighbors by sitting out on the front porch eating yogurt. They have become accustomed to my weirdness, I believe, and didn’t bat an eye.

Once your braids are dry, you can follow almost any of the many Gibson Girl pouf tutorials, including adding rats and hairpieces for even more volume. My method uses your own hair as a “rat” and involves no back-combing (teasing) because brushing out back-combed hair is the devil. I didn’t take any pictures of the adventure that occurred after the braids had finally dried. Hair is challenging enough without wrangling a camera one-handed at the same time:

Illustrations to the rescue!

101_8164

First, undo the braid at your crown. Comb it gently to fluff it up. Clip a bobby pin to the ends (or a small elastic) and roll it. This roll is going to act as your “rat,” so it doesn’t need to be perfect. For a Gibson Girl pouf that puffs over your forehead, pin the roll close behind your front braid. If you want height at the crown for 18th century styles, place the roll further back. You could also add a seperate rat into this roll to puff it up even more.101_8165

Once you’ve got the crown roll secure, undo your front braid and comb it gently to fluff it. Roll and secure it behind the crown roll.101_8166

Undo and fluff your side braids, rolling and arranging them to your liking behind your top roll.101_8168

Make a bun with your remaining hair if you haven’t already. Finally, chocolate time!

Here are my results:

101_8084

Doing my best “Dracula” face. I was trying to do the fang-over-the-lip look, then remembered that Van Helsing may still be out there…better to just smile oddly and hope he doesn’t notice…

My Gibson’s fluffy and messy because OMG I HAVE POOF AND I WANT IT ALL!

I was more concerned with retraining my hair to stop lying flat than I was with how neat and tidy every hair was. The retraining was a sucess! My hair will actually stand up on its own and support itself!

I didn’t use hairspray or anything on it and it still looked decent three hours later:

101_8132

101_8140

Here I’ve undone the bun and let the back down for a softer look.

I am obviously not a hair expert, but for a first try experiment, I am so pleased! This method requires a lot of preparation, but now that I know it works, I can work on refining it. A hairdryer would make life sooooo much easier…

The key to a good hairdo, especially some of the more complex historical styles, is finding what works for you. There are all types of hair, all sorts of styles to choose from, and different skill levels for each. Some people are naturally adept at the art of coiffures. Others (like me) would rather focus on other things. Experimentation is the best way to figure out what will work for you!

__________

More Gibson Girl Tutorials:

Edwardian Hair Mysteries Solved – Part 4 – Beginning Styling

The Seamstress of Avalon: Gibson Girl Hair: A Tutorial

__________

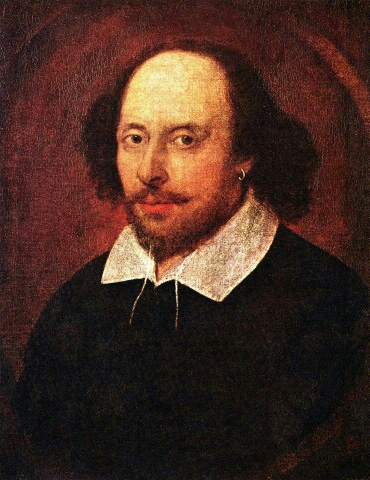
This braiding method also works perfectly for Regency and 1880s hairdos if you have bangs, fluffy styles of the 17th century, and frizzy Elizabethan poofs if ringlets refuse to cooperate. Even guys can get in on the act (Shakespeare Pouf, anyone?).

Hint: The more/smaller/tighter you make your braids, the more fluff you can achieve.

Mrs. Mauve Undergarments: A Review of Orchard Corset’s CS-411

“Scandaless” Undies!

101_7902

Yes, there is a dress attached to those SLEEVES.

Well, I did it! I have finished sewing the pink polyester-whatever dress– which I have named “Mrs. Mauve”– and all that is left to do is trim it, figure out how to trick my hair into assuming a vaguely 1890s syle, and find some time to take photos!

101_7653

Pragmatic anachronism at it’s finest!

I mentioned in my earlier posts that I was fitting this dress over improvised undergarments. I got a few questions about them, so I decided to use this as an opportunity to introduce one of my costuming staples. The corset I fitted my Mrs. Mauve dress over is my Orchard Corset CS-411. It’s a really comfortable, inexpensive underbust that, while not perfect for 1895 (underbusts came onto the scene around 1893, but weren’t common for daily wear until 1900), is a good option for Edwardian era costuming and an great companion for flouncy vintage dresses. For the Mrs. Mauve dress, I paired it with a underwire sports bra and a cotton tunic shirt for a chemise. Together, they helped hold the bust up to the proper place and prevented overtly modern jiggle.

CS-411 Corset Overview:
Price – averages $75 plus s&h
Fit – underbust to upper-hip, 10″ long
Shape – Hourglass curves

Pros:
Short length
Mobility
Doesn’t squish bust
Sturdy construction
Flattering shape
Comfortable
Fun fabric

Cons:
Laces too slick
Not enough curve
Bulky fabric

411_black_pinstripe_front__90579-1445017684-1280-12803fc3d2

Company photo of Orchard Corset’s CS-411 in Black Pinstripe

Price and Fit

My underbust-to-lap measurement is 9-9.5 inches (depending on how much I slouch). The CS-411 is 10 inches in front and 8.5 inches on the side, making it just short enough for my torso. I do get a little extra “uplift” in the bust, especially when I sit down. It is one of the shorter ready-to-wear corsets on the market at the moment and one of the cheapest– most Orchard Corset styles average about $75 but are often offered on sale (O.C. recently added an even shorter cincher, the CS-201). Besides my pinstripe version, the CS-411 comes in a variety of fabrics, including satin, cotton, and brocade. The brocade and pinstripe corsets are thicker than the satin corsets, so they are very sturdy, but your outside measurement will be larger because of the added bulk. For example, even cinched fully closed, my 24 inch corset has an outside measurement of 27 inches. If outside measurements concern you, the satin is your best option. They also offer this style in breathable cotton, but I have not tried it yet.

Shape

According to Orchard Corset, the CS-411 is a Level 3 silhouette. Level 3s are the curviest corsets the company currently offers. I definitely get eye-catching curves, but I wouldn’t classify them as extreme. There is a 9 inch difference between the hips and waist on my corset which remains fairly constant through all Orchard Corset Level 3s. It is perfect for tubular and round body shapes. Pear shapes might find the hips a bit tight. Ladies with natural hourglass curves might be underwhelmed by the CS-411’s shape since it may closely mimic your own body, fitting to it instead of shaping it.

Pros

I really like this corset. Though I bought it primarily for costuming, I wear it as a modern accessory, too. I have worn it to Thanksgiving (and eaten in it without trouble) and to the mall. It goes wonderfully under vintage pieces as well, which I love. Compared to an overbust corset or a longline corset, it is very easy to move around in. Since it is an underbust, it doesn’t squish my bust down or give me “quad-boob” as many off-the-rack overbusts do, nor does it rub my underarms– a big issue I’ve had with corsets in the past. I also love that I can sit normally in it without the bottom edge jamming into my thighs. It’s great for my posture, too!

101_6733

The pinstripe fabric I chose is a thicker poly fabric that has held up very well. When it is cold, the thick fabric gives me an excellent, warming hug! The construction of the corset is very nice quality; all Orchard Corsets are lined and have a waist tape, plus the CS-411 is double boned at each seam. The flexible spiral steels conform really well to my body and the cut of the corset gives a nice, swooping curve without rubbing my hips or ribs. It makes me feel very regal, but devious– always a good feeling to have in my book!

Cons

There are a few things about the CS-411 that bother me. The biggest gripe I have is that the laces the corset comes with are very stretchy and slick, so getting it to lace tightly is an exercise in futility unless you keep the tension very precise and constant when you are tying the laces. It also tends to loosen as you wear it, so even if I close it all the way and tie it tightly, half and hour later there will be a 1 inch gap in the back. Orchard corset does sell other laces, or you can re-lace it with something sturdier, but I wish they would just put good laces on the corset in the first place. The corsets are inexpensive enough that I would be able to afford, and would gladly pay, the extra $8 to have my corset come laced with good laces right out of the package.

101_7491
As I discussed earlier, the CS-411 has really nice hourglass curves, but if you are particularly curvy yourself, you might not be as impressed with your transformation. The fabric I chose is very thick, so while my waist inside the corset is ~24 inches, my outside measurement is ~27. Buying a corset to achieve a “proper size” isn’t how you should go about buying one, but if you are concerned about a smooth fit under clothes, the thinner (but still strong) satin is probably a better choice because it won’t have as much bulk as the poly-brocades do. The brocade also takes longer to break in and doesn’t mold as readily to your body. I would definitely buy a satin or cotton version next time. I am considering their shorter CS-301 for my vintage gowns since the CS-411 has a difinitive line around the hips that shows when I wear it under close-fitting gowns and in pants (the CS-411 does just fine with fluffy dresses, though).

All in all, the CS-411 is a good corset for the money. For historical costuming, it works well for 1890-1912 (or earlier with a firm bra and a cavalier attutude towards pure authenticity). The CS-411 does its job, and would be a good corset for a beginner, stage performer, or casual wearer. I’d rate it a 3.5 out of 5.

corsetrating

I am not paid by Orchard Corsets to give reviews. I simply wear their corsets and thought that others might appriciate a review about their use in historical costuming (there are plenty of waist training and general reviews of this corset online if you are looking to wear this corset with modern clothing).

For more information on corsets, please visit Lucy’s Corsetry. She is one of the best modern-corsetry experts on the web and covers everything from drafting your own corset to corsetting health concerns.

(The wild skirt is an Indian belly dancing skirt that someone was using for swing dance before I got ahold of it and decided to use it as a tawdry Edwardian petticoat!)

Other Corset Reviews:

IMG_0308

Corset Story’s Waist Taming Overbust with Hip Gores