The Procrastinator’s Purse: A Free Printable Reticule Pattern

So I am the queen of procrastination and when I made my Renaissance Fair dress last month, I realized the night before that I had nowhere to put my “modern necessities,” i.e. my cellphone, chapstick, safetypins, and the like.

Drawstring purses are pretty easy to make and there are tons of variations ranging from a simple square folded over to more complex bags with flat bottoms, and fancy linings. I have made simple drawstring purses mere minutes before I had to be out the door, but this time I had a few hours. Plenty of time for a slightly gussied-up version! All I knew is that I wanted something shield-shaped that could fit my book-shaped cellphone case and other sundries. This is the final result, which I’ve dubbed THE PROCRASTINATOR’S PURSE:

I was originally going to do an exhaustive walk-through of how to draft your own pattern for one from a piece of US Letter (A4) paper…

…but then I decided to save y’all the trouble and just make a PDF version you can download and print from home!

The Procrastinator’s Purse Pattern PDF

To maximize the size, it does go all the way to the edges of the paper, so your printer at home may cut off the top and bottom a bit. Just draw it back in. I am no professional pattern or instruction drafter myself, so don’t worry about getting it just right. This is the Procrastinator’s Purse, not the Perfectionist’s Purse!

I put two shapes on the pattern for you to choose from: a sharp triangle bottom (solid line) and the curved shield-shaped bottom (dotted line). Seam allowance is already accounted for. This pattern can be sewn with a 1/2″ or regular 5/8″ seam allowance. It’s just up to your personal preference and how much room you want.

The first time I made this purse, it took two and a half hours because I was just making it up as I went along and I added trim. Now that I know what I’m doing, the plain striped version I whipped up for this post took only an hour to make!

Step 1: Cut 2 of your fashion fabric and 2 of your lining fabric. The lining will show, so keep that in mind when picking out your fabrics!

I picked two scraps for this demonstration: striped faux-silk from the Regency waistcoat I made for my friend Wix and swiss dot cotton from my Butterick 6093 project.

If you want to add any trim across the front of your purse–like I did for the yellow and black version of this bag–sew it to the right side of your fashion fabric first before proceeding with the next steps.

Step 2: Pair each fashion fabric piece with a lining piece. Put the right sides together. Use a pin to mark where the top line of the drawstring stitching goes on each side.

Step 3: With right sides together, sew each fabric/lining pair around the squared top edge starting above the pins marking your drawstring. I recommend backstitching at the beginning and end of your stitch line for strength.

Clip the corners before turning the pieces right-side-out. Iron the pieces flat, turning under the seam allowances about 2 inches down the sides. This will make sewing the drawstring channel easier. Sorry I didn’t get a picture of this step, but if you scroll down to the picture in step 5, you can see the leftover fold marks.

Step 4: Sew the drawstring channel. The channel I put in the pattern is 1/2 inch wide. This is top-stitched, so your stitching will show on the outside of the bag. Pick a color of thread that blends into your bag (at least for the most part).

Step 5: Once you’ve got both drawstring channel stitch lines done, make small snips in the seam allowances so you can iron it flat. Do this to the seam allowances on both the fashion fabric and lining.

Once you’ve snipped the seam allowances and ironed the two halves of the purse flat, put the two halves together with the fashion fabric sides together.

Step 6: Stitch the two purse halves together starting below the bottom of the drawstring channel. Backstitch at the start and end of your stitch line for extra strength. Be careful not to sew the ends of your drawstring channel shut!

This purse is not bag-lined, so it will have “raw-ish” edges on the inside (remember: this is the Procrastinator’s Bag, not the Perfectionist’s Bag!). To minimize fraying and add strength to the seam, I zig-zag stitched close to my original stitch line and trimmed away the excess fabric for a neater finish (especially if your fabric wants to fray like my faux-silk did).

Turn your Procrastinator’s Purse right-side out and iron.

Step 7: Cut two long pieces of ribbon and thread them through the drawstring channels on each side of the bag.

28 inches is a good length for your ribbon, though if you like longer, more luxurious tails, you can cut yours 32 inches long. You will loose about 2 inches of length trimming the ends later, so keep that in mind.

For this demonstration purse, I used 1.5 inch wide poly satin ribbon from Walmart, which is about the widest you can fit into a 1/2 inch boning channel. For my first yellow purse, I used 3/4 inch wide ribbon elastic (the type used to make headbands and hair ties). I like the elastic  because it holds the “scrunch” at the top of the bag better than the smooth ribbon, but it does make your bag bob around when you walk and it will stretch the more stuff you carry.

To get the ribbon through the channel, I folded it over a few times and put a safety pin through as a makeshift bodkin.

The following steps are optional ones I did to achieve the look I wanted. You can do all sorts of things to personalize your Procrastinator’s Purse depending on how much you procrastinated. Have a few hours left? Add some beading. Have a few minutes left? Just tie your ribbons together and get in the car, girl!

Since I had an hour left, here’s what I did to my purse:

Trim the edges of the ribbon diagonally. This removes the pinhole left by the safety pin and will help keep the ends from fraying. To weigh them down, especially if you used a lightweight synthetic ribbon like my Walmart poly one, tie a simple knot an inch or two back from the end. You could even add beads (like the large-holed ones used for add-a-bead jewelry) if you wanted to gussy it up for evening-wear!

Tie the ends of the other ribbon together to form a carrying loop.

This purse is very deep, which is great if you have a large phone or plan to really stuff it full of souvenirs. However, all that stuff puffs out the point, distorting the nice shape and leading to a lot of inelegant and frustrating digging around for tiny things at the bottom of the purse.

To alleviate both these problems, I squared off the bottom with a line of stitching 1.5 inches up from the point. I marked a optional stitching line for it on the PDF pattern. This stitch line can be moved father down, too, if you want a squared bottom, but your phone/fan/etc. needs a bit more room.

The joy of horizontal fabric stripes: my fabric happened to have a handy-dandy line right where I needed it!

And for a last bit of pizzazz, I added a dangle to the point of the purse. For both purses, I used an Indian wedding earring from a pair that I found at a flea market.

AND IT’S DONE!

This purse is big enough that everything in the above picture– cellphone+case, chapstick, 40″ strand of glass pearls, vintage cigarette-turned-business-card case, safety pins, hairpins, and fan– fits inside:

Shazam! Magical disappearing act!

Huzzah! Now I have one version that matches my Renaissance dress and another that will work with my Regency and Edwardian dresses!

It’s not perfect, but it’s a pretty, practical project for the ambitious Procrastinator!

If you make your own Procrastinator’s Purse (or any drawstring purse), pop over to my Facebook Page and send me a picture so I can see it!

Bonnets that Deserve Better: A Dozen Ugly Ducklings in the Met’s Headwear Collection

I love a good bonnet, even if badly photographed. <3

Museum photography has come a long way in the past decade. I remember when the only way to explore a museum’s collection was to physically travel to view an exhibit in person, be buddies with a curator, or read about them in textbooks, sometimes with a blessed-but-grainy black and white picture the size of a domino. Now museums around the world have their collections photographed and available for free online!

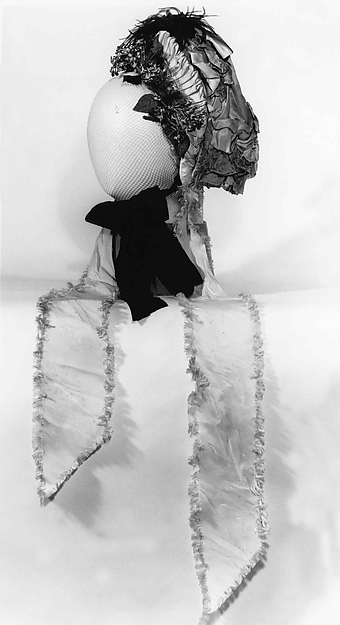
We have gone from this:

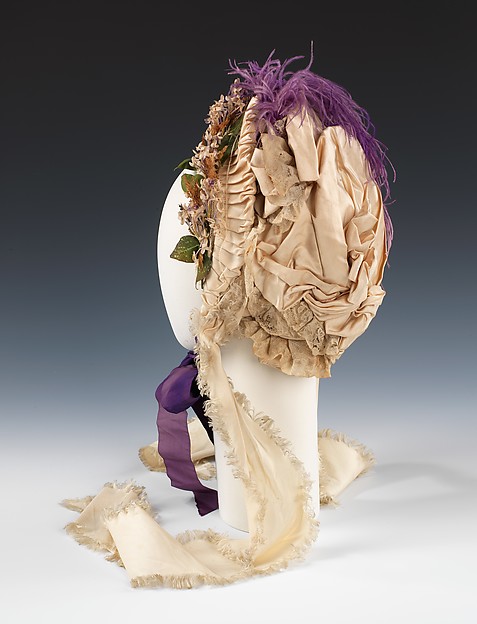
To this:

Bonnet, circa 1870

Huzzah! Hooray! Oh, happy day!

And believe me, I am infinitely grateful. But, I am also infinitely concerned with systematic forward progression and implementing improved standards of quality (i.e. I am demanding and persnickety). Today, I am picking on the Met because the Met is one of my favorite museums. They seem open and honest about their collections– even candidly blogging about some drawings in their collection were massively mis-attributed! You can even give them feedback about their website, rating it and saying what you liked and what you didn’t. I appreciate their openness and make full use of it. MMoA, you asked for it!
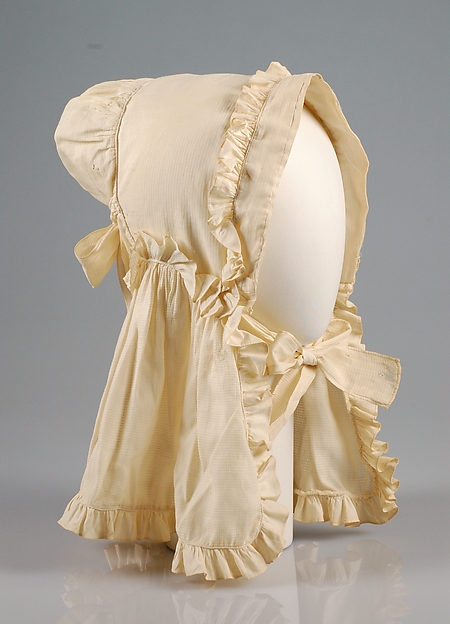
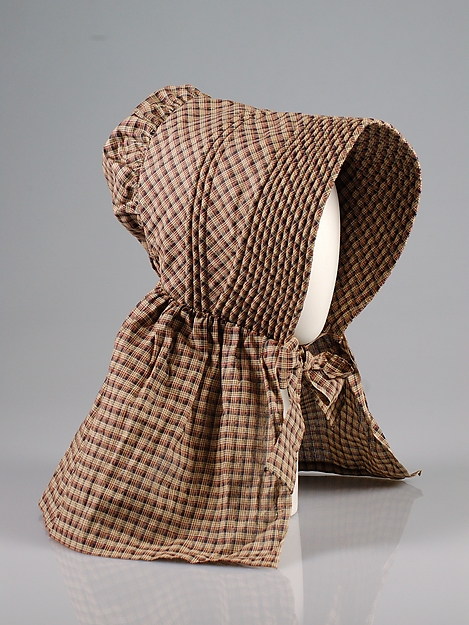
In my many invested hours of research (i.e. PINTEREST), I have discovered many beautiful Met Museum objects with hideous photos, in particular, 19th century bonnets and hats. Granted, there are plenty of hideous objects with lovely pictures as well. There is clearly a miracle-working photographer in the costume department because they made this clunky sunbonnet look so lovely I kind of want it…which is saying something because I LOATHE 19th-century sunbonnets!

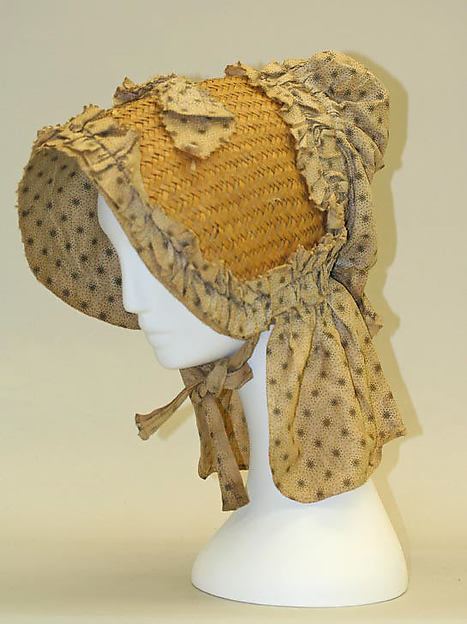
Cotton Sunbonnet, circa 1860
This photo makes it look good enough to actually wear!

Now, compare that picture with this one:

Sunbonnet, circa 1838
Ah, there’s the warm, familiar hatred again. If Jedi had to wear sunbonnets, I would instantly become a Sith. No questions! Sunbonnet Crusher duty? SIGN ME UP!

Okay, so maybe I am exaggerating a little. You see, that second bonnet isn’t terrible at all! In fact, it’s actually way more adorable than the photo lets on. It’s made of a spotted calico that’s kind of polka-dotty from a distance, it’s got pinked trim, a nifty straw brim, and a sweet bow perched on top. But that photo just does not do it justice when you compare it to other bonnet photographs in the collection:

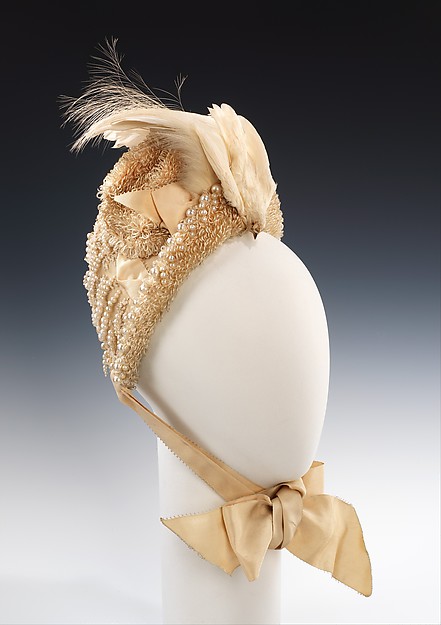
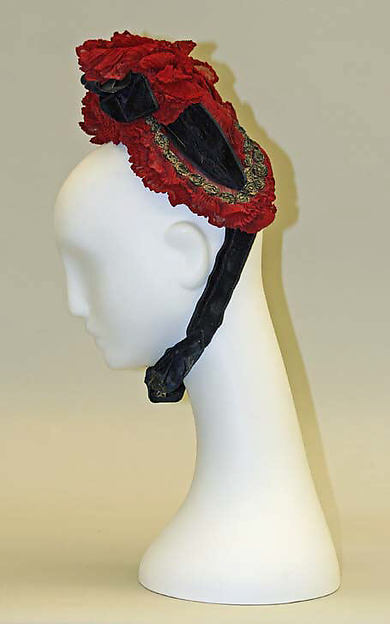
Snedden Designer Bonnet with Pearls, circa 1883
(another bonnet that has benefited from the leap in photography technology)

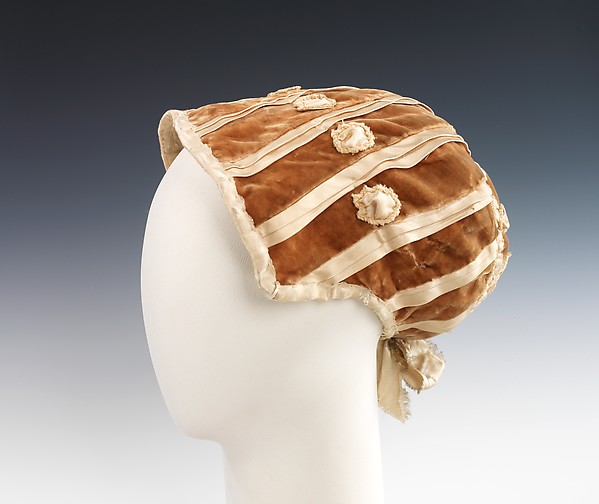
Velvet Evening Bonnet, 1802

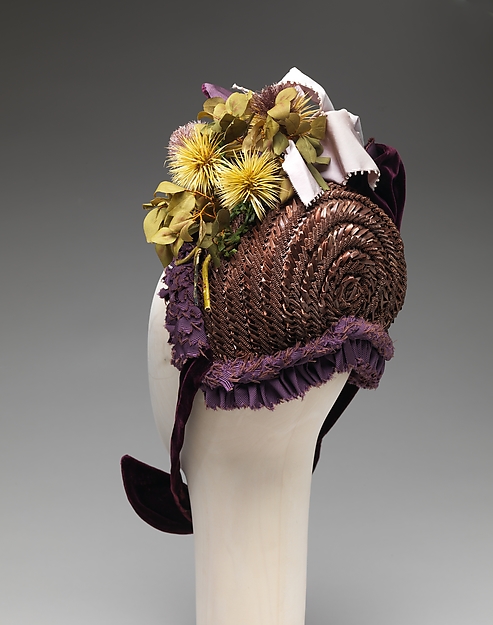
Bonnet, circa 1887

“But, Liz! Those are all fashionable, fancy-lady bonnets! You can’t compare a daytime 1850s sunbonnet to a 1880s millioneress’s bonnet!”

True: there are many bonnets of vastly different styles, decades, price-points and occasions, but being fancier doesn’t make them any less likely to be photographed poorly. The Met does not discriminate based on social class! Case in point:

Which of these two photos looks like a million bucks to you?

I started making note of all the bonnets I found that were begging for a better photo. The list was quite long! However, I narrowed it down to just a few.

MOST of the bonnets are this list were not picked just because I thought they needed a prettier photo–though, confession: some are on the list because they are OMGorgeous! There are so many pretty-but-not-artistically-photographed bonnets in the Met’s collection, like this early 19th century bonnet. However, many of them, despite their flash-blasted, yellow-tinged photographs, still shine through with clear detail. Instead, I chose bonnets that I thought were actively hampered by their photo– those with great texture that was lost, fit that was hard to judge, or colors that weren’t properly portrayed, all details that are actively explored and sought after by costume and textile researchers.

THE TOP 10 BONNETS AT THE MET THAT DESERVE BETTER PHOTOS!

#10: “Ye Old Bonnet?!” circa 1799-1810

Originally #10 was this straw bonnet that I loved the shape of, but there is no view of the front. However, I stumbled upon this bonnet/headdress just before publishing my list. I was so intrigued, I knew it had to be on the list! There is no other “bonnet” like it in the Met’s collection and if that date is correct (question: has anyone seen something like this from the era?), it would make it one of the earliest pieces in the bonnet sub-category. I want to know more!
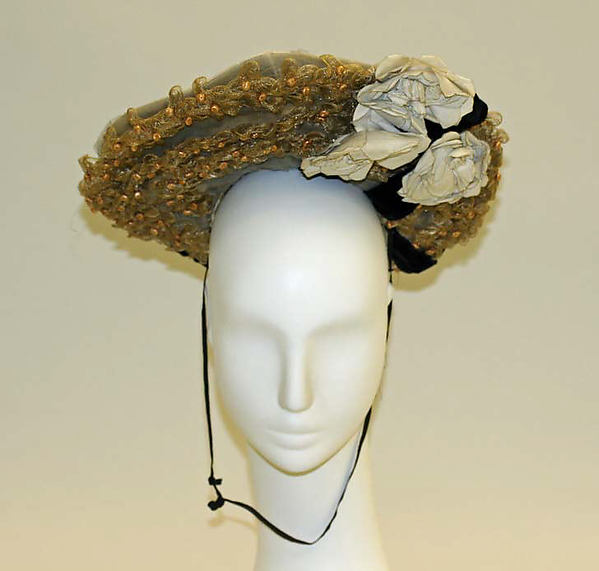
#9: “Happy Spring Day in a Dust Storm” Bonnet, circa 1860

This is one of those “It’s just so pretty it needs to be shown off!” bonnets. The layers of trimmings are so lovely, but the dingy, grainy photo does its richness a great disservice.

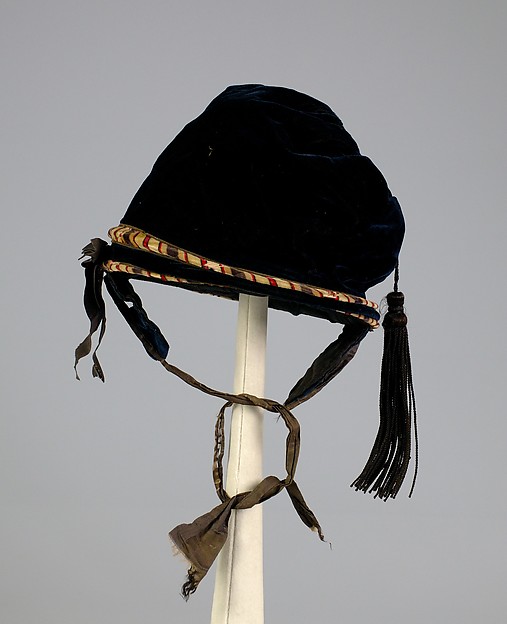
#8: “Black Velvet Mystery” Bonnet, circa 1850

This bonnet already has a beautifully lit, crisp new photo, yet, it’s impossible to tell how it fits! It’s listed as a bonnet, but the shape and fit isn’t obvious. Does it perch on the back of the head? Is it a child-sized cap? Or is it bigger than it looks? This is a piece that would really benefit from a display head.

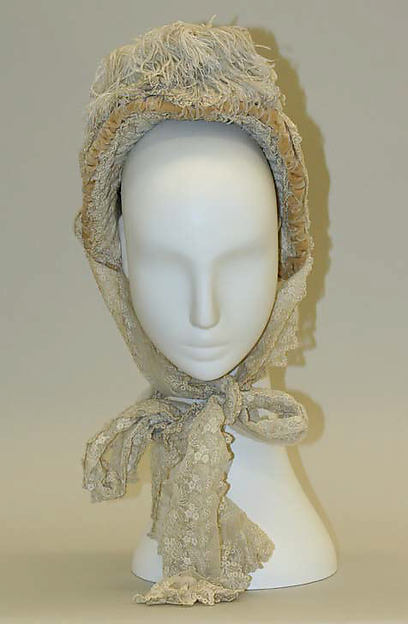
#7: “Snow Princess” Lace Bonnet, circa 1885-90

Another stunner suffering from bad lighting and graininess! This bonnet is mummified in lovely lace, has a velvet edge, and a feather on top! The interplay of textures and true color are lost, though, and the angle of the two photos almost look like two different hats! Click here to see the second photo of the back. You’ll see what I mean. Also, this hat has a photo of the designer’s label, but it’s not listed in the description (J. Pendlebury / Wigan). This was a very expensive hat during its day! It would be so lovely for a bride.

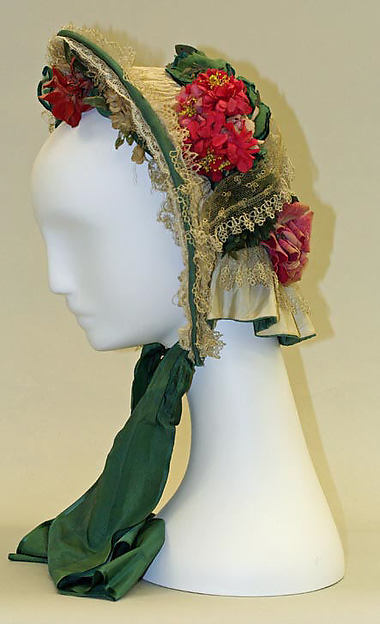
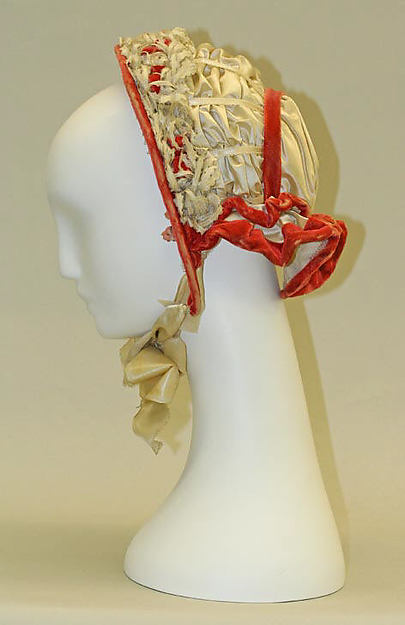
#6: “Scarlet’s Envy” Promenade Bonnet, circa 1851-1862

The vast majority of the Met’s mid-19th century bonnet collection suffers from small, badly-lit photos. I imagine they must have been doing them all in a  swift batch in order to give us, the demanding costuming community, visual references. The Met has worked hard to get photos for every object’s online catalogue page! They are getting closer to achieving that goal. I am so thankful for their hard work. However, this gal is beautiful, but the silk gathers and layers upon layers of delicate trimming aren’t very well portrayed. I also think it’s later in date than listed. Any bonnet experts have a firmer date for it?

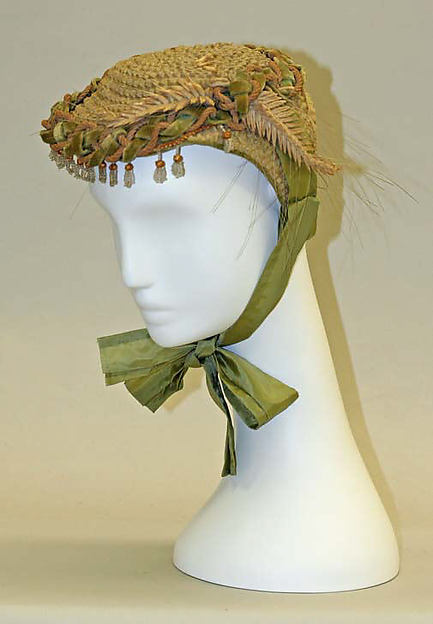
#5: “Autumnal Delight” Bonnet, circa 1864-1867

This bonnet is just fabulous! At first I thought that it was a lovely example of straw work, but then I read the description…can you believe this bonnet is made of horsehair?! I would have never guessed!  Once again, the small, grainy photos erase this bonnet’s main draw: the unique materials and lush interplay of textures. Just look at those woven plumes and tiny tassels! This is probably my personal favorite bonnet on the list. I would wear it in a heartbeat.

#4: “The WAT?!” Bonnet, circa 1800-1925

I’m calling this one that “WAT?!” bonnet not because I find it poorly designed (though the display certainly makes it look odd), but because it is in desperate need of a cleaning, some context, and a more accurate date. 125 YEARS, MET?! REALLY?! This bonnet/hat is from around 1900 and would have been paired with a Gibson Girl hairstyle, hence the shallow back (to fit around a chignon) and large forward swoop (to go over the puffy pompadour front). It even has a designer label inside that they photographed, but the cataloger failed to note in the description. It’s not a show-stopping hat by any means, but it certainly deserves better basic cataloguing in addition to a fresh photo!

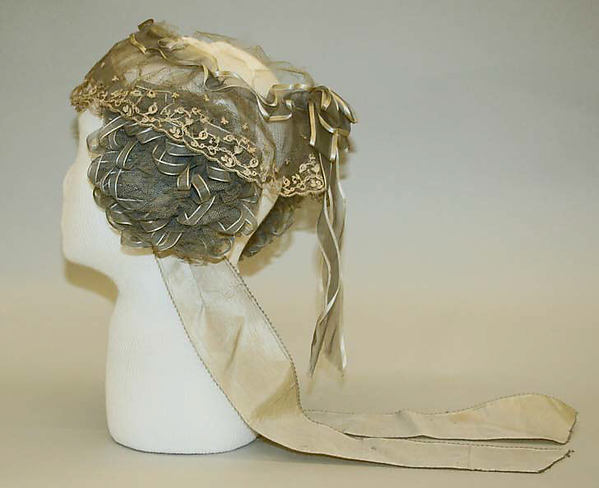
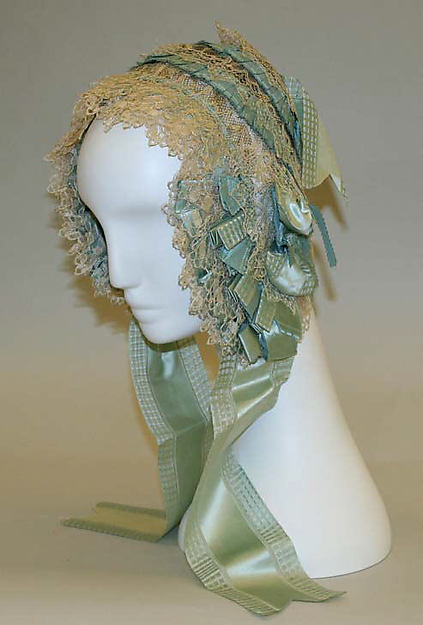
#3: “Cinderella” Bonnet/Cap, circa 1845-50

Just look at that lace and ribbon! Wow! Even in that terrible lighting, it looks amazing. However, the image is small and grainy, so you can’t see all the wonderful details. This one is just too pretty not to have a better photo!

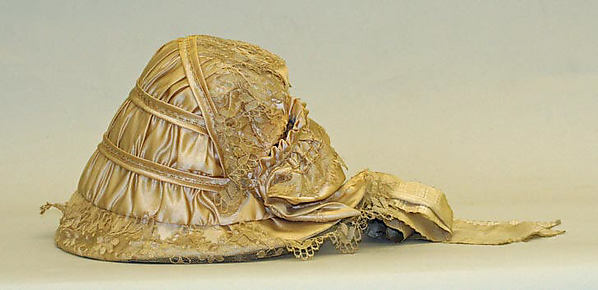
#2: “Faceplant” Poke Bonnet, circa 1840-69

This bonnet is so sad! It looks like a jellyfish washed up on the shore or a snail trying to crawl away. I suppose if you were a nice “Sunday’s best” bonnet that got labelled as a poke bonnet, you’d be sad, too. This bonnet would be so much happier if its beautiful silk satin shirring and lace were properly photographed on a stand or mannequin!

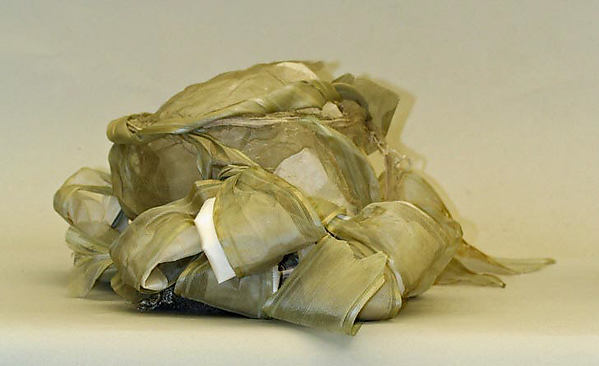
#1: “Moping Mop” Ribbon Bonnet, circa 1841

The last bonnet  looked sad, but this poor bonnet is actively trying to hide. Perhaps it’s in such poor shape that this is the only way to display it (like this crumbling 1830s straw bonnet), but it’s completely impossible to tell that it’s even a cap/bonnet. What’s even odder is that unlike many of the bonnets in the collection which suffer from dating swathes that range from a generalized 20 year period to the egregious 125 YEAR RANGE OMG MET WTF, this bonnet has been dated precisely to 1841. In addition, it was purchased with donation money in 1982, apparently by choice. Either it was part of a lot that had other pieces in it the Met wanted and the cap just came with, or they purposefully bought it, possibly with provenance granting it such a firm date, like a letter or label. And yet, here it is, just flopped on a table like a mound of seaweed.

The more I looked at these bonnets with less-than-ideal photos, the more I realized how shallow and callous it was to judge a bonnet by its photo. In our massively visual online culture, objects with the prettiest images often get sharing priority, meaning that many perfectly fabulous fashions get ignored! This affects not only personal research, but can affect the quality of conservation, too. Many objects that receive well-made professional photographs often receive special cleaning and repairs in order for them to display and photograph to the object’s best advantage. In a collection like the Met’s–with over 300+ bonnets alone– such a large undertaking would involve not only lots of time, equipment, and effort from the photographer(s), but a large investment from the conservation department– and let’s face it: we may love bonnets, but there are probably more pressing conservation projects than cleaning a common straw sunbonnet, no matter how cute it is.

Interested in seeing more awesome bonnets with horrific pictures?
Click here to view the Met’s bonnet collection online

Let me know which one is your favorite! Is it a delicate straw bonnet from the 1840s? A sky-high feathered stunner from the 1880s? A tubular Regency poke bonnet? Post a link below so I can see it!