Alternate Title:
Le Chapeau Rusé – Using Bad French to Disguise Excellent Hat Trickery
To complement my Robe pas Cher and to ensure that I was suitably dressed for an outdoor excursion, I needed a hat to wear for Georgian Picnic. In addition, I had sorely neglected the past, oh, ten or so Historical Sew Fortnightly challenges and I wanted a good stepping stone project to get back on track.
Enter Le Chapeau Rusé!

I had plunged myself so deeply into making a suitable costume for Christopher that by the time I got around to my own costume, I was a little burnt out and very very far behind schedule. I managed to eek out a wearable muslin from my test pattern, but I always feel under-dressed without accessories, so I decided I needed a hat. I didn’t have time to order one and I had foolishly missed out on all the post-Halloween sale merchandise. However, there was no need to worry because I had long ago discovered this post about placemat hats by the Thread-Headed Snippet:

With a title like that, how could I resist?
Inspired by Miss Snippet’s thrifty, simple solution to my problem, I set out to make my own version.
What follows is the three basic steps to making a super-cheap 18th century “Chapeau Rusé” out of an old placemat.
1. Pick a Proper Placemat

15 inches is a good, easy-to-find placemat size, but if you can find larger rounds, they’ll work as well. Hats were rather sizable during the 18th century, so don’t be shy!
If you can find genuine straw placemats, more power to you! Mine was a completely fake polypropylene straw placemat I found for $1 at Garden Ridge (the picture is the same brand on Amazon). Fake straw placemats have the advantage of being very springy and forgiving, but they are not historically accurate in the least. Real grass or straw mats are more period appropriate, but straw can be brittle and crack, so how you plan to wear the placemat/hat dictates which material is more suitable. While a natural, tawny straw color is a safe choice for both materials, almost any color of placemat will work as long as it matches your outfit (though I’d avoid brighter colors if you want an authentic look). Also, if it has bands of decorative braiding or a little extra color woven in, that’s perfectly fine for an 18th century hat.
2. Settle on a Shape
18th century hats for ladies come in many shapes and sizes, but the quintessential mid-century hat is the bergère, a wide brimmed hat with a low crown:

“Portrait of Eleanor Frances Dixie” by Henry Pickering, circa 1753
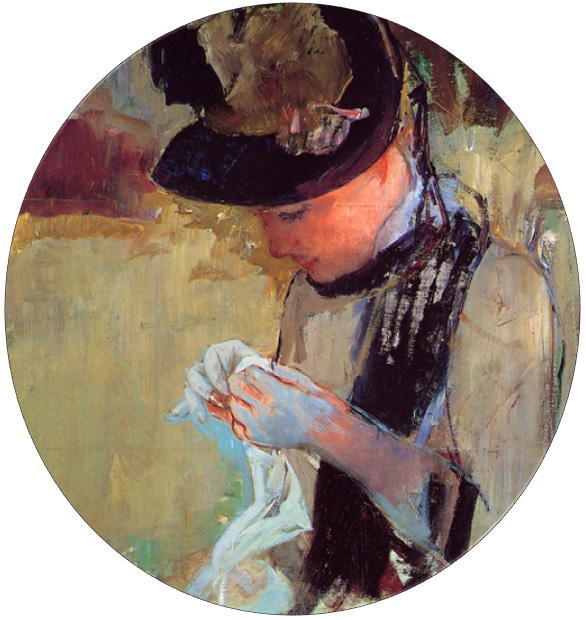
This is the type of hat the Thread Headed Snippet made her placemat into; it is also the shape I chose for Becky’s hat. Originally, I was planning on making another bergère hat for myself, but I was horrendously jealous of Christopher’s tricorne, so I decided to make a folded straw hat which, while more uncommon, was not unheard of:

“Portrait of a Lady in a Straw Hat” by by Christian Wilhelm Ernst Dietrich, mid-18th century
Another option is a giant D-shaped hat, like these:

“Portrait of Lady Elizabeth Foster” by Angelika Kauffmann, circa 1785

D-Shaped Dutch Straw Hat, 18th century
If you can find a big enough straw mat or if you want to make a smaller version, just carefully cut off one edge of your placemat and finish it with glue, or when you decorate your hat, place the “crown” closer to one edge.
If you were lucky enough to find a real straw mat, you can even reshape it to have a crown. My fake straw placemat, however, wasn’t malleable in the manner traditional straw is, but it folded beautifully. To figure out the shape I wanted, I held the folds in place with pins so I could adjust the placement and size as needed before I tacked everything into place with sturdy stitches. You will find that pliers are exceptionally helpful to get a needle through all that plastic!
Once you settled on a shape, add ties so your hat won’t fall off. Most 18th century straw hats had ribbon ties that were secured to the underside of hat near the place where the brim and the crown connect:

Bergère Hat, 18th century
I used 48 inches of 7/8″ grosgrain ribbon for mine, but most ribbon between 1/2″ and 3″ wide will work:

For flat hats, the farther from the center of the hat you sew your ribbon, the more bowed downward and bonnet-shaped your hat will become. If you want the hat to lie fairly flat on your head, I recommend tacking the ribbon down 3-4 inches from the center on each side. Use pins to hold the ribbon in place before you sew it on so you can fiddle with how the hat will sit on your head.
3. Decorate!

Real straw placemats pretty much become suitable hats the instant you apply the ribbon in Step 2, but without decorations, a synthetic straw placemat hat will look like you’re wearing..well..a placemat, so don’t be too miserly when it comes to trimming. There are infinite ways to decorate your hat. Popular trims include:
Poufs of fabric or ribbon
Bows
Flowers and wheat
Feathers and plumes
Embroidery/appliques
Fabric and Coverings
I chose to use fabric scraps left over from my dress to create ruffled white trim and two types of bows from pinked purple fabric (I love saying “pinked purple” out loud, no matter how many weird looks it earns me!).
I used a large bow called a Double Ruffle to trim the back:

I found the free tutorial on the wonderful Ribbon Retreat website which has plenty of other tutorials for different styles of bows. I was also inspired by the Flower Loop bow because it reminded me of 18th century cockades, so I made two for each side of my hat and put a silvery button in the center of each for a little textural contrast (all the fabric and ruffles gets a little too fluffy for me sometimes and I need to balance it out with a harder edge).

To turn a placemat into a bergère, add a small circle of puffed ribbon to create the illusion of a minute crown. Otherwise, trim, trim, trim until you can’t see the straw anymore or leave it fairly plain with only a bit of ribbon or a light net veil— it’s up to you!
More 18th Century Lady’s Hat Resources
“18th Century Women’s Hats” research collection at Larsdatter – Great for inspiring your creativity. This site is downright amazing!
“How to make an 18th century hat. A tutorial in pictures.” by Dressed in Time – Sew your own hat from scratch.
“An 18th Century Hat” by The Fashionable Past – How to cover a straw hat with pleated silk.
“Tutorial: How to turn a straw sunhat into an 18th century bergére” by The Dreamstress – Exactly what the title says!
“The Amazing Crafthat Pt. Deux : Finishing!” by American Duchess – How add a stylish, floppy fabric crown to a straw hat.
..and this.
HSF Stats
“Le Chapeau Rusé” – 18th Century Folded Straw Hat
The Challenge: #23 Gratitude
Fabric: White cotton and purple polysatin scraps
Pattern: None
Year: 1760-1780
Notions: Poly cotton thread, buttons, grosgrain ribbon, and I guess the placemat would count as a notion???
How historically accurate is it? 40% It is entirely handsewn and trimmed with appropriate trimmings inspired by extant examples, but it’s made from a faux straw (read: plastic) placemat.
I am grateful to: The Thread Headed Snippet for sharing her placemat hat (http://threadheaded.blogspot.com/2012/08/so-you-want-hat-but-you-have-will-power.html) and Ribbon Retreat for their free bow tutorials (http://www.theribbonretreat.com/Catalog/free-hairbow-instructions.aspx)
Hours to complete: 3 hours
First worn: In my bathroom for fitting, but officially at Georgian Picnic in the park
Total cost: $1 for the placemat, 50 cents for the buttons, $2.50 for the ribbon
I must disclaim that my French is limited to what I remember from an old library book I read in 6th grade and what Google translate can help me piece together. Many 18th century fashions came from France and thus had French names, so in that tradition, I decided to play around a bit with giving my cheeky 18th century creations equally cheeky French names (unless you are fluent in French; then you are council to all my poorly-translated secrets)!

Darling idea!
This tutorial is great, I must try it! Thank you for the idea!
You could try to heat and mold the center of the fake placemat over a large tin can, using a hair dryer.
It is very good French and great idea !
Placemats are great! And your hat is very cute!
What foul witchery is this?! Your Mat Hat looks like an actual HAT! I love it. And can we talk about your dress for a second? That color is gorgeous on you.
The hat really suited your face – I loved the shape and trimmings.it looked perfect with your dress.
The hat turned out lovely. As did your outfit. Coincidentally, I also made a hat out of straw placemats a few months ago. I made a large dutch hat, like the D-Shaped Dutch Straw Hat you pictured here. I didn’t find large enough placemats, but I actually managed to sew a few of them together to achieve the look.
Hats are so fabulous and fun to make!
You made a cocked hat (called a tricorn today) but none of the images show a cocked hat. Then it’s decorated in a cute way but not based on any of the period illustrations. Are there any period illustrations of a woman wearing a straw cocked hat? This hat is a really good Halloween costume but shouldn’t be used by those interested in history.
I think you are a bit confused: this is the Pragmatic Costumer: Historical Costuming for the Rest of us. Perfect period accuracy isn’t my aim and never has been. This is a costume made for fun 6 years ago. The “straw” was polypropylene. The dress was polyester. The shoes were suede pumps the 1980s. We ate fruit salad from Walmart with plastic cutlery. Your concern is a bit misplaced. But thanks for your compliment and concern kind citizen. I suppose you could simply choose not to fold your hat if you are concerned about strangers harshly judging your costume during private outings with friends.